If you don’t have XAMPP, please install it first according to “Installation of XAMPP“. And If you’ll use MariaDB in a production environment, make it secure by setting password according to “How To Set MySQL Password in XAMPP“.
Method
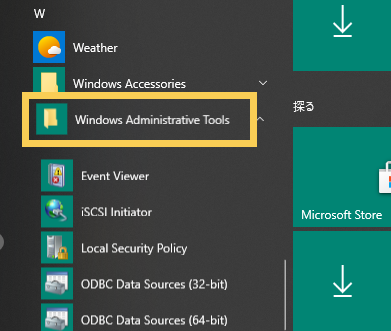
1. Open phpMyAdmin
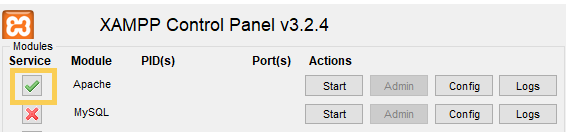
Start XAMPP Control Panel and run Apache and MariaDB.
Access localhost/phpmyadmin/ or click Admin button of MySQL.
If you don’t have XAMPP, please install it first according to “Installation of XAMPP“.
XAMPP security
Please refer to “Is XAMPP production ready?” in Windows Frequently Asked Questions for information. Though it contains some old contents, but it says why default XAMPP shouldn’t be used in a production environment.
Method
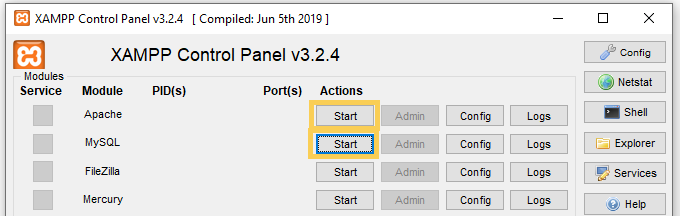
1. Run Apache and MySQL
Start XAMPP Control Panel and run Apache and MySQL.
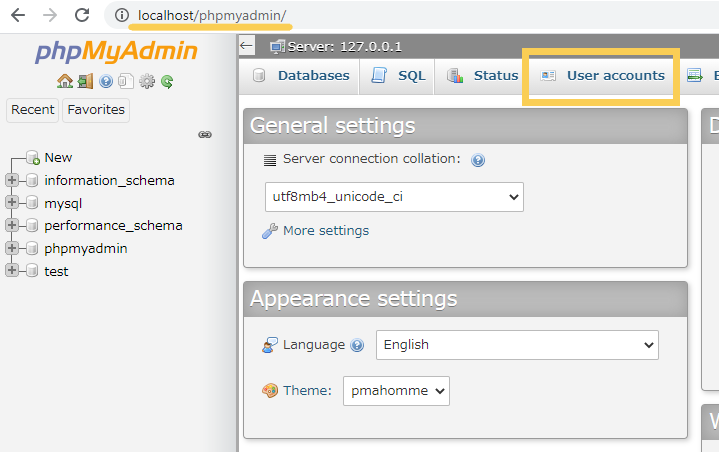
2. Access phpMyAdmin and change password
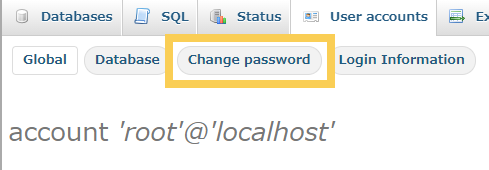
Access localhost/phpmyadmin with your browser. And click “User accounts”.
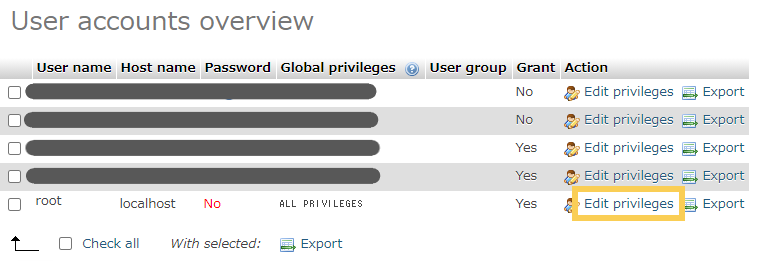
Click “Edit privileges” for root@localhost.
Click “Change password”.
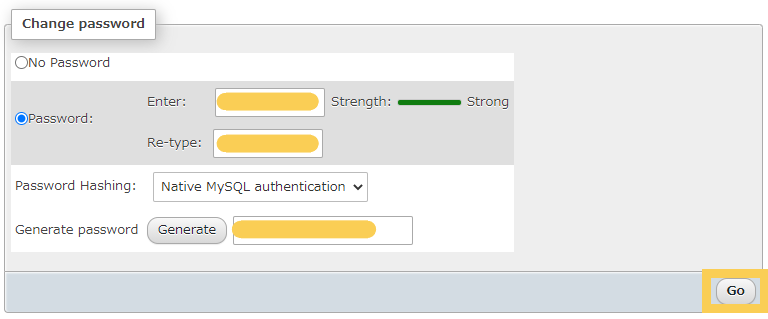
Input your password. You can generate highly safe password with Generate button. And click “Go” button.
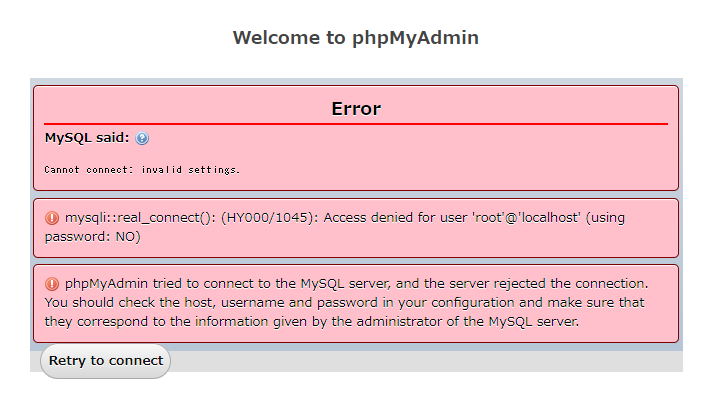
Close phpMyAdmin.
*An error will occur when accessing phpMyAdmin now because phpMyAdmin doesn’t know the password.
3. Change config.inc.php of phpMyAdmin
Open xampp\phpMyAdmin\config.inc.php and change the value of $cfg[‘Servers’][$i][‘password’].
/* Authentication type and info */
$cfg['Servers'][$i]['auth_type'] = 'config';
$cfg['Servers'][$i]['user'] = 'root';
$cfg['Servers'][$i]['password'] = '';  //input the password here
Save the file and close it.
Confirmation
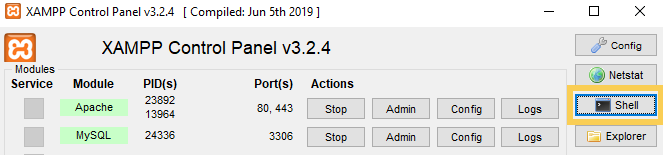
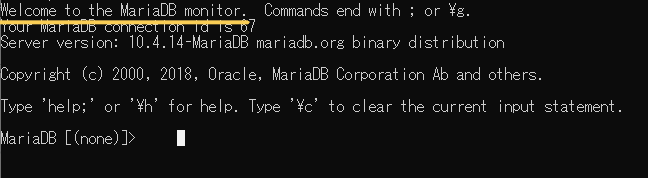
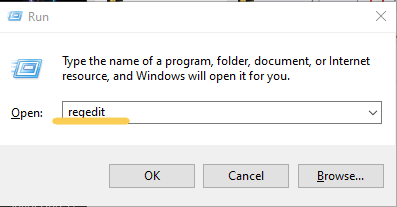
Open the shell.
And input command “mysql -h localhost -u root -p” and the password you defined.
# mysql -h localhost -u root -p
Enter password:  <input password here>
Confirm that MariaDB is connected.
Input “quit” to quit MySQL.
And confirm that you can access localhost/phpmyadmin.
I installed XAMPP in Installation of XAMPP. Today, I’ll use XAMPP as a test environment for PHP.
GOAL
To setup XAMPP and start PHP development in XAMPP.
How to start XAMPP
Be sure that the started module is stopped before quitting the control panel.
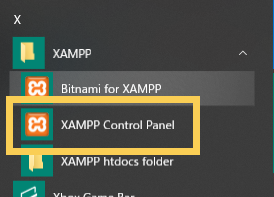
Method 1 Use xampp/xampp-control.exe
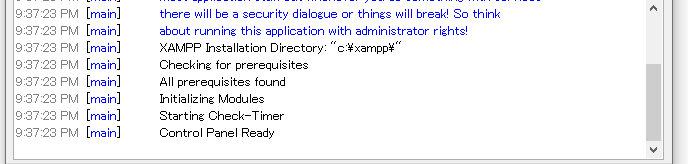
Right-click and run as administrator “xampp/xampp-control.exe” or “XAMPP Control Panel” in start menu.
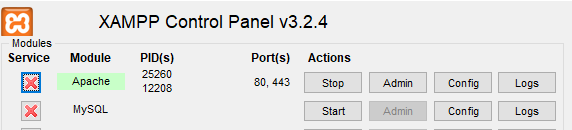
Click “Start” buttons on the control panel.
If you add modules as a service, the check box is checked. *You can’t see whether the check box is checked if you run the control panel as a non-administrator.
In this article below, a situation in which all modules are not registered as a service is supposed.
Click “Start” to start Apache and access localhost to confirm that apache is running.
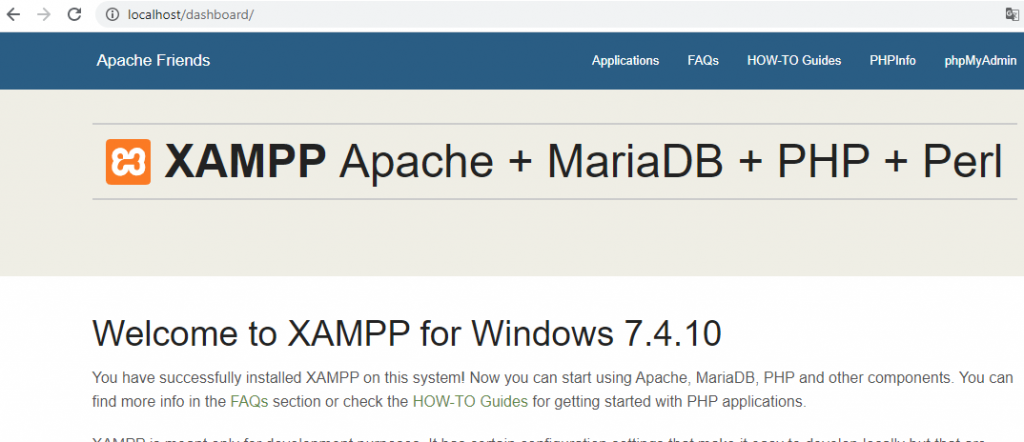
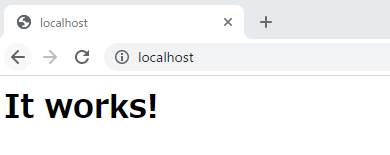
Open browser and input “localhost”The index page of XAMPP
Method 2 Use batch file
Use batch files in xampp\ directory to start each application individually.
xampp\xampp_start.exe xampp\xampp_stop.exe xampp\apache_start.bat xampp\apache_stop.bat mysql_start.bat, mercury_start.bat and filezilla_start.bat
Run your php program
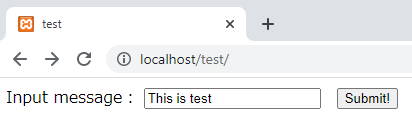
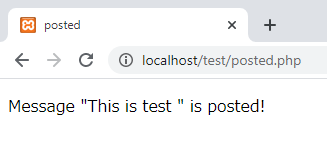
The directory “xampp\htdocs” is document root that is assigned to localhost. So you can run your php program by putting the php file here.
Open xampp\htdocs\index.php and you can see the program to redirect users to localhost/dashboard by using header() function.
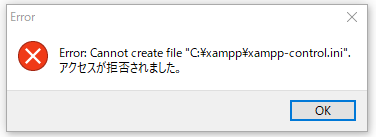
When I quit XAMPP, an error “Control Panel, an Error: Cannot create file “…\xampp\xampp-control.ini” occured.
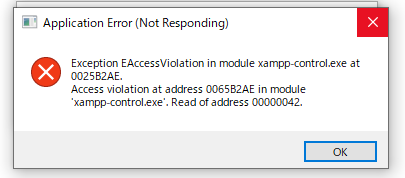
And the message “Application Error (Not Responding)” displayed.
Environment
Windows10 XAMPP 7.4.10
What is xampp-control.ini?
If you’d like to know what XAMPP is, please refer the article “Installation of XAMPP“. xampp-control.ini is the configuration settings of XAMPP. It contains variables and values as below.
Today’s goal is to understand what XAMPP is and how to install it. This article doesn’t contain how to use XAMPP or PHP.
Environment
Windows10 XAMPP 7.4.10
What is XAMPP?
XAMPP is a free development environment for PHP. It contains the set of basic free software for web development, such as Apache, MariaDB as a SQL server, PHP, Perl, phpMyAdmin and OpenSSL.
You can see what software is included in XAMPP in the official site.
XAMPP is an acronym for cross platform(X), Apache, MariaDB, PHP and Perl.
How to Install XAMPP
1. Download
Access “Download” page in the official site. And download any version of XAMPP you like.
To change settings of Apache and use your local directory as root directory.
Before changing settings of Apache, install and setup Apache. Refer to “How to Build Local Server 1” for more about installation procedure.
Environment
Windows 10 Apache 2.4.43
Change local server root
1. Set DocumentRoot in httpd.conf.
I created new directory “root” in Apache24 and set it as DocumentRoot.
# DocumentRoot: The directory out of which you will serve your
# documents. By default, all requests are taken from this directory, but
# symbolic links and aliases may be used to point to other locations.
#
#DocumentRoot "${SRVROOT}/htdocs"
DocumentRoot "${SRVROOT}/root"
<Directory> Directive can control group of directives.
Directives detail
Options: The Options directive controls which server features are available. Indexes: If a URL which maps to a directory is requested and there is no DirectoryIndex (e.g., index.html) in that directory, then mod_autoindex will return a formatted listing of the directory. FollowSymLinks: The server will follow symbolic links in this directory. This is the default setting. You can see more of Options directive in Options Directive.
AllowOverride: When this directive is set to None, .htaccess files are completely ignored. .htaccess file is the configurations file for non-administrator users. You can see more of Options directive in AllowOverride Directive.
Require: This directive tests whether an authenticated user is authorized according to a particular authorization provider and the specified restrictions. all granted: Grant access to all requests. You can see more of Options directive in Require Directives.
Confirm results
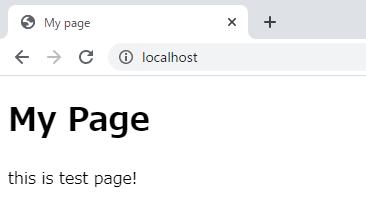
Put index,html and resources into root directory. Access localhost with any browser you like.
To setup Apache and build local web server with it. In this article, you can only display default page. If you would like to create new directory as a local serer, check “How to Build Local Server 2” after Apache setup.
Environment
Windows 10 Apache 2.4.43
What is Apache?
Apache is open source application for implementation of an HTTP (Web) server. You can build local web server and global web server regardless of whether it is commercial use or not.
Why is the local web server necessary?
Local web server is used as a virtual environment for development and test before publishing to the live server. You can make local file a test server that only local users can access.
2. Click Files for Microsoft Windows if you use windows. * Click “Binaries” if you don’t use windows. * I don’t know why but I couldn’t click “Source: httpd-2.4.43.tar.bz2”.
3. Select one sit from the list. In my case, I clicked “Apache Lounge”.
4. Install Apache 2.4.43 Win64 or Apache 2.4.43 Win32
Setup
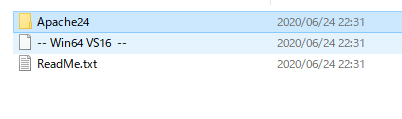
1. Unzip httpd-2.4.43-win64-VS16.zip and open it. You can see the directory named “Apache**”.
2. Put the directory “Apache24” into the directory you want. I put it on document directory.
3. Open Apache24>conf>httpd.conf with your favorite text editor.
Change definition of SRVROOT into the path to “Apache24”
# If your host doesn't have a registered DNS name, enter its IP address here.
#
#ServerName www.example.com:80
ServerName localhost:80
Start Apache
Use command as below or just double-click httpd.exe.
Open command prompt and change directory into the Apache24¥bin
> cd C:\Users\USER_NAME\Documents\Apache24\bin
> httpd
AH00558: httpd: Could not reliably determine the server's fully qualified domain name, using ******. Set the 'ServerName' directive globally to suppress this message
If you got an warning about fire wall, allow the access in private network.
Access localhost
How to run httpd in the background?
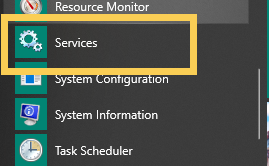
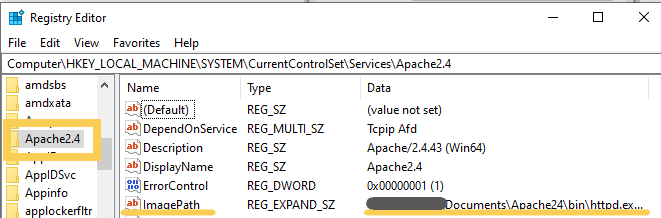
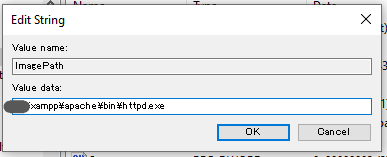
You should register httpd as a windows service. Open command prompt as administrator and install httpd.
> cd C:\Users\USER_NAME\Documents\Apache24\bin
> httpd -k install
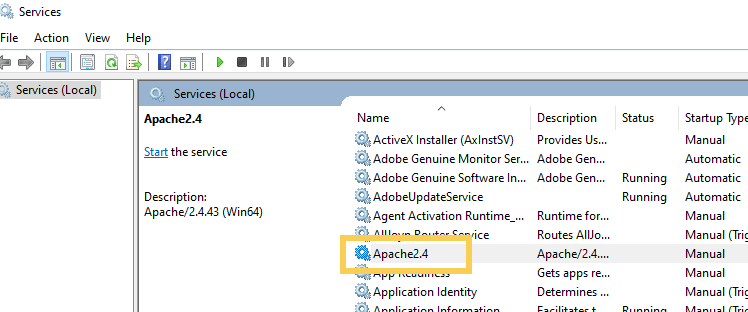
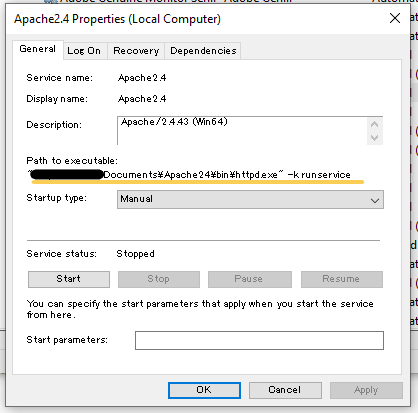
Installing the 'Apache2.4' service
The 'Apache2.4' service is successfully installed.
Testing httpd.conf....
Then you can start httpd by command as below.
httpd -k start
You can stop/shutdown by commands as below. It works only when command prompt is run by an user as administrator.
> httpd -k stop
> httpd -k shutdown
Change contents
Put index.html and resources into Apache24\htdocs. I put index.html below.
Cross-Origin Resource Sharing is sharing resources from a different origin by using additional HTTP headers to allow a web application to access to that resources.
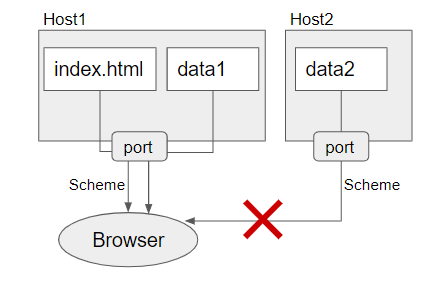
What is origin?
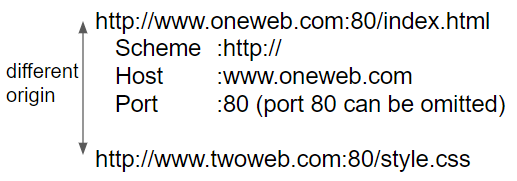
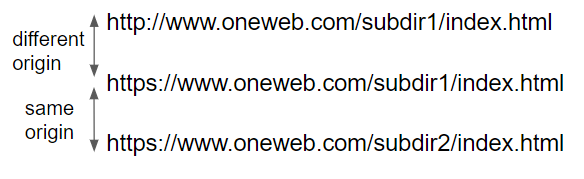
Origin is the currency to decide resource sharing and isolating. Usually actors in the Web platform that share the same origin trust each other and have the same authority.
Origin is defined by the scheme, host and port of the URL of the resource. Scheme is client server protocol, http or https.
They are examples of same-origin and different-origin.
What is origin for?
When a browser need to get resource from a server, the browser should check whether the server is different from the one where index.html is. That’s because access to the cross-origin server can causes cross-site printing. The rule is called cross-origin policy.
Mechanism of CORS
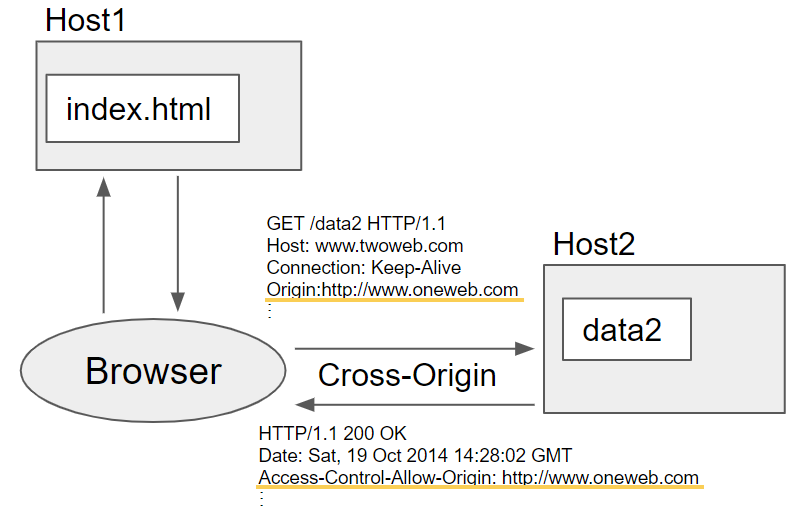
Client (Web browser) adds “Origin” to HTTP Request header. If the origin is included in Access-Control-Allow-Origin of HTTP Response header, data can be transmitted.
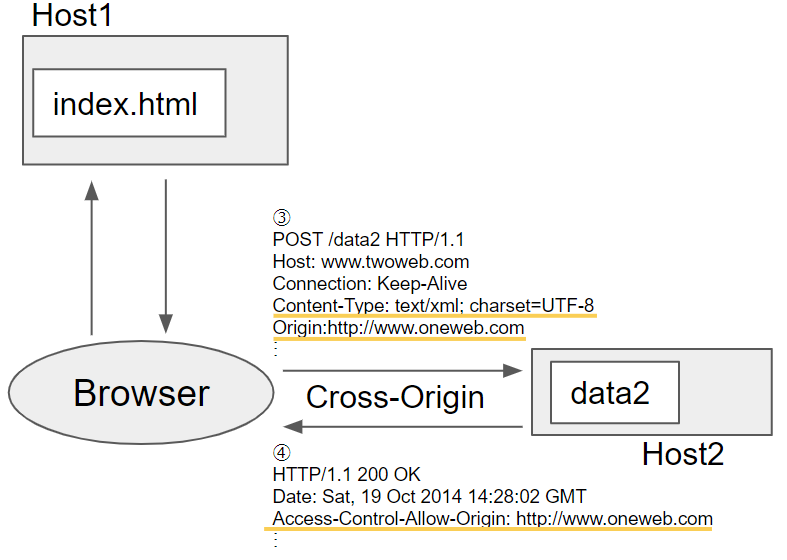
In cross-origin resource sharing, browser uses the HTTP OPTION request method to preflight the request. Preflighting is to check if a request is accepted to the server before sending it.
However, simple requests that meet some conditions don’t trigger preflight. There are multiple conditions, and you can see them from the link below.
If the request from browser is not simple request, browser first send an HTTP request by the OPTIONS method. Then server responses to preflight request. After preflight request is complete, the real request is sent:
The value of Origin in request should be contained in Access-Control-Allow-Origin in response. The value of Access-Control-Request-Method should be contained in Access-Control-Allow-Methods in response The values of Access-Control-Request-Headers should be contained in Access-Control-Allow-Headers in response.
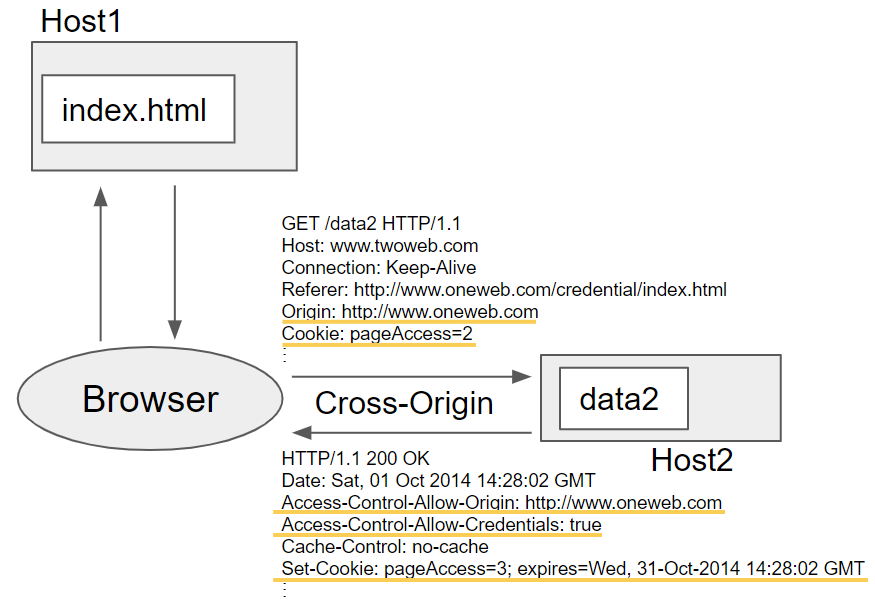
3 Requests with credentials
Browser can send request that are aware of HTTP cookies and HTTP Authentication information. If web application needs a resource on cross-origin server which sets Cookies, browser send GET request with Origin and Cookie header. Then server send response with Access-Control-Allow-Origin, Access-Control-Allow-Credentials(true) and Set-Cookie header.
The origin of Access-Control-Allow-Origin should be the same one as the value of Origin in the request header.