Category: Web

Implementation Of Ajax (Search Suggestion)

GOAL

Today’s goal is to implement a search suggestion as below. The suggestion should be displayed without page transition while inputting the search word.

Environment

Windows10
XAMPP 7.4.10

What is Ajax

AJAX, Asynchronous JavaScript And XML, is a term that refers to a group of Web development techniques for asynchronous communication on the client side using JavaScript. Please check “What Is AJAX (and Asynchronous Communication)?” for details about ajax.

The following is a brief explanation about the ajax mechanism.

How Ajax works

In Ajax, the 2 system “sending the request and getting the response from the server” and “get the data from the browser and reflect the received data to the browser” are separated. So users can operate on the browser while waiting the response.

This image has an empty alt attribute; its file name is image-2.png
(more…)

How To Create JSON Data In PHP

JSON is used for data exchange in PHP. But how can I create json data in php and pass it to JavaScript?

GOAL

Today’s goal is to generate Json data from PHP array and get the data in JavaScript. This can be used when getting data from the server in PHP and processing the data in JavaScript.

Method

1. Create a nested array data

<?php
$teachers = []
$teachers = [
    "101" => [
        "name" => "Poppins",
        "class" => "music",
    ],
    "102" => [
        "name" => "Dolittle",
        "class" => "natural history",
    ],
    "103" => [
        "name" => "Snape",
        "class" => "pharmacy",
    ],
];
?>

You can create the nested array with for loop, too.

<?php
$teachers = [];
$data_set = [["101", "Poppins", "music"],["102", "Dolittle", "natural history"],["103", "Snape", "pharmacy"]];
for($i=0; $i < count($data_set); $i++){
    $teacher = $teachers_list[$i];
    $teachers += array($teacher[0] => array("name" => $teacher[1], "class" => $teacher[2]));
}
?>

2. Generate Json with json_encode() function

<?php
echo json_encode($teachers);
?>
//output => {"101":{"name":"Poppins","class":"music"},"102":{"name":"Dolittle","class":"natural history"},"103":{"name":"Snape","class":"pharmacy"}}

3. Get the data in JavaScript

Get the json string from the variable $teachers and convert the string to the Object with JSON.parse().

<script type="text/javascript">
    var json_str='<?php echo json_encode($teachers); ?>';
    var json_obj = JSON.parse(json_str);
    console.log(json_str)
    for(k in json_obj){ // get keys
        var teacher = json_obj[k];
        console.log("name: " + teacher['name']);
        console.log("class: " + teacher['class']);
    }
/*
--console output--
name: Poppins
class: music
name: Dolittle
class: natural history
name: Snape
class: pharmacy
*/
</script>

Source Code

The Completed Code is as below.

<?php
$teachers = [];
$teachers = [
    "101" => [
        "name" => "Poppins",
        "class" => "music",
    ],
    "102" => [
        "name" => "Dolittle",
        "class" => "natural history",
    ],
    "103" => [
        "name" => "Snape",
        "class" => "pharmacy",
    ],
];
?>

<script type="text/javascript">
    var json_str='<?php echo json_encode($teachers); ?>';
    var json_obj = JSON.parse(json_str);
    console.log(json_str)
    for(i in json_obj){
        var teacher = json_obj[i];
        console.log("name: " + teacher['name']);
        console.log("class: " + teacher['class']);
    }
</script>

Create Search Form with PHP

GOAL

Today’s goal is to create search form to find the name from the database.

Environment

Windows10
XAMPP 7.4.10

Method

This is an adjusted version of the code in “Access MySQL with PHP in XAMPP“. So please check the article first.

Search form

Use post method and the form is named “word” as below.

<form action="" method="POST">
    <label>Name:</label>
    <input type="text" name="word" /> <input type="submit" value="Search" />
</form>
(more…)

[Tips] How to fit p content in the parent box.

Problem

In HTML, some URL or long sentence sticks out of the parent box. The following is an example.

<div class="box">
	<p>This is an example of short message</p>
</div>
<br/>
<div class="box">
	<p>ThisIsAnExampleOfLongMessage</p>
</div>
.box{
	width:120px;
	border: 2px solid #111;
}

Result

The cause of this problem

This is because of the settings of word-break or overflow-wrap (or word-wrap). Define word break point by word-break css property or define when the browser should insert line breaks within an otherwise unbreakable string.

Reference: word-break, overflow-wrap

Solution

Solution1. Set “word-break” break-word

.box{
	width:120px;
	border: 2px solid #111;
	word-break: break-word;
}

Solution2. Set “overflow-wrap” break-word

.box{
	width:120px;
	border: 2px solid #111;
	overflow-wrap: break-word;
}

Result

Create sidebar.php for original theme

This is one of the articles about project “Create Original Theme in WordPress”.

GOAL

To create sidebar.php

Environment

WordPress 5.5.1
XAMPP 7.4.10

sidebar.php

<?php
/**
* The template used for the sidebar
*@package WordPress
*@subpackage Techblog
*@since Techblog 1.0
*/
?>
<?php if ( is_active_sidebar('sidebar') ) : ?>
	<aside id="sidebar">
	<?php dynamic_sidebar('sidebar'); ?>
	</aside>
<?php endif; ?>

functions.php

‘widgets_init’

‘widgets_init’ is the hook to initialize widgets such as sidebar. You should hook the register function register_sidebar() with add_action(). Please check the article “What is Hook in WordPress?” for detail about hook in WordPress.

In my case, techblog_widgets_init() is the function to register sidebar.

/*sidebar*/
function techblog_widgets_init() {
	register_sidebar( array(
		'name'          => esc_attr__( 'SideBar', 'techblog' ),
		'id'            => 'sidebar',
		'before_widget' => '<div id="%1$s" class="widget %2$s">',
		'after_widget'  => '</div>',
		'before_title'  => '<h3 class="widget-title">',
		'after_title'   => '</h3>',
	) );
}
add_action( 'widgets_init', 'techblog_widgets_init' );

Add widget

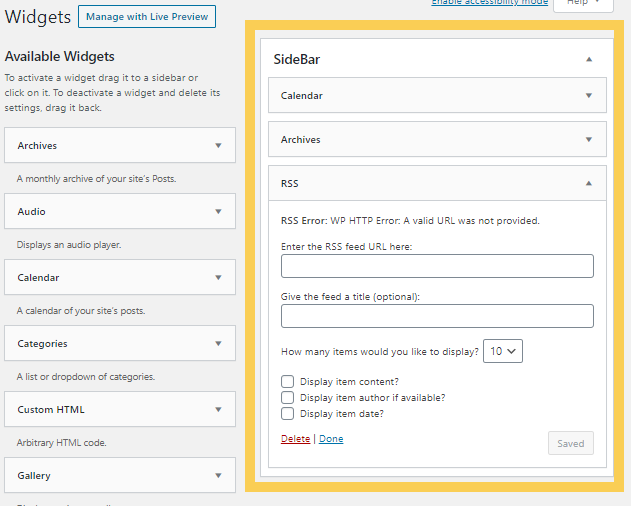
Add widgets into the created sidebar into the created sidebar with name “SideBar”.

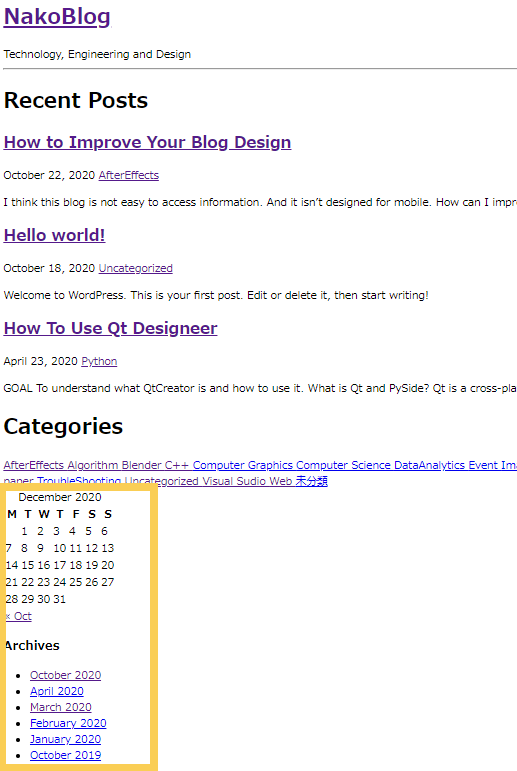
Result

Change the style

Create Original Theme in WordPress 2

At the last time, in “Create Original Theme in WordPress 1“, I created the simplest minimum theme “techblog”. I’ll create practical WordPress theme from now on.

GOAL

To design the configuration of the WordPress site.

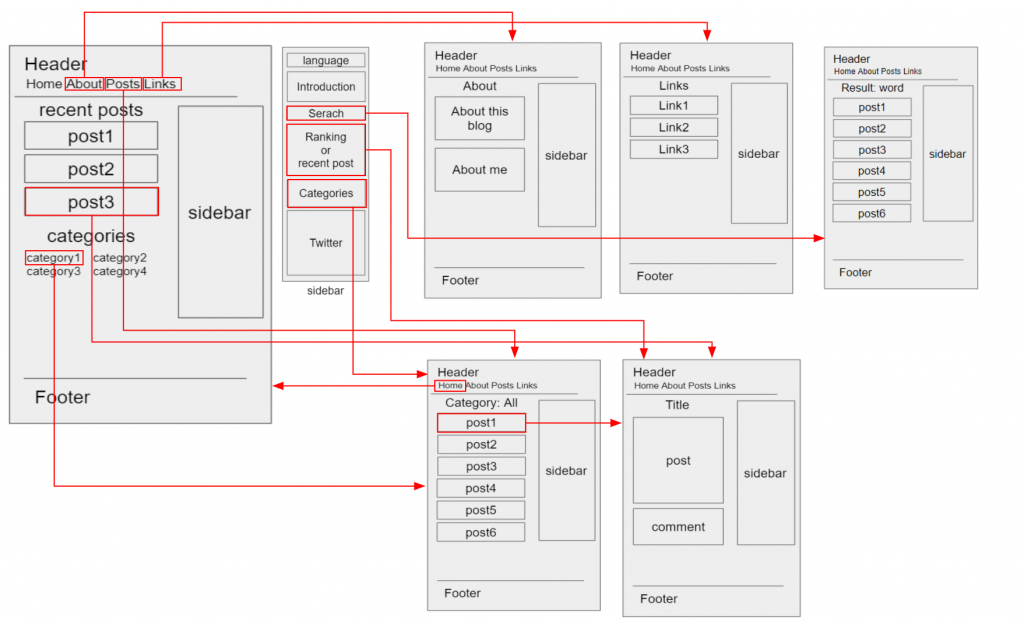
the configuration of pages

This is the page transition diagram. The top page is home. Pages “Home”, “About”, “Links” and “Posts(Post List)” can be accessed directly with main menu.

This is the construction of each page and links among them.

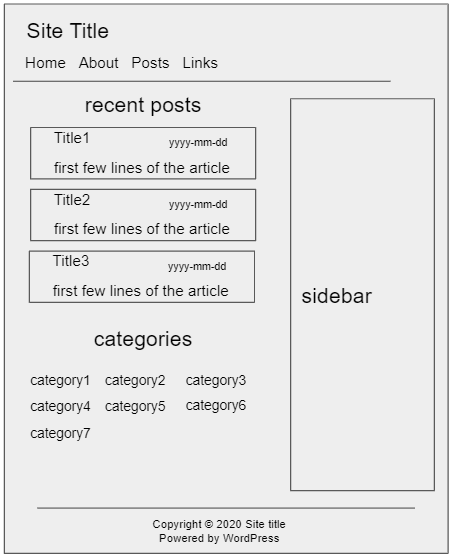
Detail design of each page

Home page

This page is used for “Home”.

Posts page

This page is used for “Posts (all posts)”, the result searched by categories and the result searched by words.

Single Page

This page is used for “About”, “Links” and the page for each single posts.

Side bar

Some of these items can be added easily by using Plugins.

Create Original Theme in WordPress 1

ULTIMATE GOAL

To create the original WordPress theme

GOAL

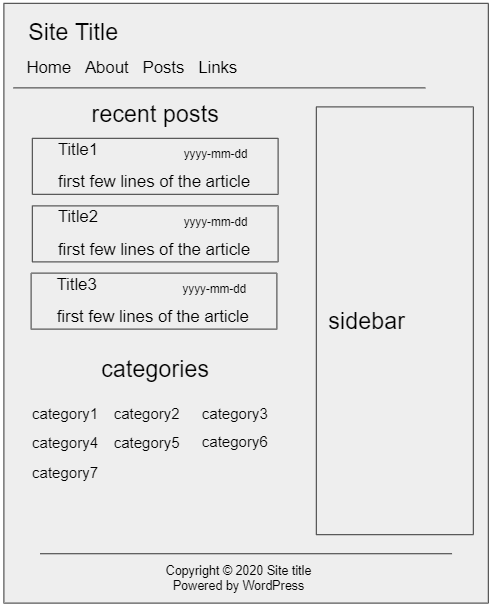
Today’s goal is to make the smallest WordPress theme as below.

File construction for WordPress theme

The following is an example of file construction.

  • index.php
  • header.php
  • footer.php
  • archive.php
  • comments.php
  • 404.php
  • page.php
    • page-fullwidth.php
  • sidebar.php
    • sidebar-home.php
    • sidebar-footer.php
  • single.php
  • category.php
  • tag.php
  • functions.php
  • style.css
  • templaete-parts
    • content.php
    • content-frontpage.php
    • content-none.php
    • content-single.php

You can see the role of each file in wordpress.org “Template Files”. Today, I create index.php, functions.php and style.css

index.php

This is the main PHP file displayed as a top page.

<?php
/**
*This is main file for "techblog" theme
*@package Techblog
*@since Techblog 1.0
 */
get_header(); ?>
<main id="main" class="site-main" role="main">
	<header>
		<h1 class="page-title"><?php bloginfo('name'); ?></h1>
		<h2 class="description"> <?php bloginfo('description'); ?></h2>
	</header>
	<?php if ( have_posts() ) : ?>
		<ul id="posts">
			<?php while ( have_posts() ) : the_post(); ?>
                <li><a href="<?php the_permalink(); ?>">
                	<h2 class = "post_item"><?php the_title(); ?></h2>
                </a></li>
			<?php endwhile; ?>
		</ul>
	<?php endif; ?>
</main>
<?php get_footer(); ?>

PHP Doc Tags

Some PHP doc tags are used in WordPress. You can see the list of PHP doc tags in “PHPDoc Tags” in wordpress.org.

*@package Techblog
*@since Techblog 1.0

php functions

You can see the functions that can be used in WordPress in “Code Reference“.

  • get_header()
    • Includes the header template for a theme
    • If you have no header.php, it includes the default header.
  • bloginfo()
    • Display information about the site you defined.
    • You can get information such as ‘name’, ‘description’ and so on.
  • have_posts()
    • It can be used to determines whether current WordPress query has posts to loop over
  • the_post()
    • Iterate the post index in the loop
    • It can be used when have_posts() is True
  • the_permalink()
    • Displays the permalink for the current post
    • It displays the url to the_post()
  • the_title()
    • Display or retrieve the current post title
    • It displays the titel of the_post()
  • get_footer()
    • Includes the footer template for a theme

style.css

style.css is the style sheet for the site. style.css should have infromation about the theme. Please check “Main Stylesheet (style.css)” in wordpress.org for details.

/*
Theme Name: Techblog
Theme URI: #
Author: Nako
Author URI: https://s-nako.work
Description: This is the simplest theme for engineer's technical blog
Version: 1.0.0
License: GNU General Public License v2 or later
License URI: http://www.gnu.org/licenses/gpl-2.0.html
Text Domain: techblog
Domain Path: /languages/
Tags: blog, news,

This theme, like WordPress, is licensed under the GPL.
*/

body {
    color: #6B6B6B;
    background-color:#DADADA;
    font-family: 'Open Sans', sans-serif;
    line-height: 1.7;
    font-size: 14px;
}

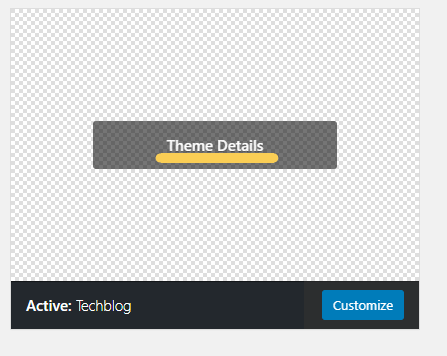
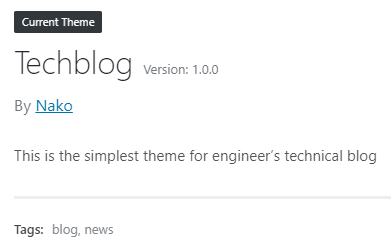
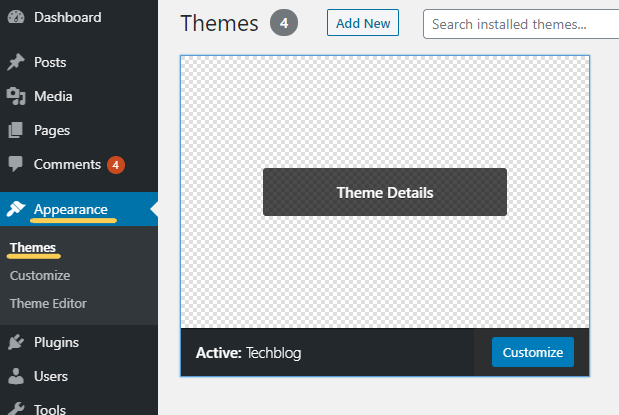
The information in style.css is displayed in Appearance >Themes.

functions.php

functions.php is function set for the site. I don’t use any original function at this time.

<?php
/**
 * techblog functions and definitions
 * @package Techblog
 * @since Techblog 1.0
 */
if ( ! defined( 'TECHBLOG_VERSION' ) ) {
	// Replace the version number of the theme on each release.
	define( 'TECHBLOG_VERSION', '1.0.0' );
}

Install the created theme

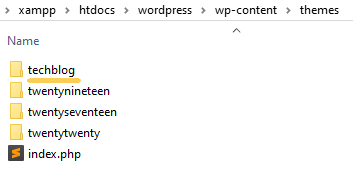
Put the directory where index.php, style.css and functions.php is into the themes directory “xampp\htdocs\wordpress\wp-content\themes”.

You can activate the theme you created in the Appearance >Themes.

How To Develop WordPress in XAMPP

I’d like to create my original theme for WordPress. This is the preparation for development of WordPress in XAMPP.

GOAL

To create develop environment for WordPress development in XAMPP.

Environment

Windows10
XAMPP 7.4.10

If you don’t have XAMPP, please install it first according to “Installation of XAMPP“. And If you’ll use MariaDB in a production environment, make it secure by setting password according to “How To Set MySQL Password in XAMPP“.

Method

1. Install WordPress

Download WordPress from wordpress.org.

2. Put the WordPress into the root doc

The default root doc is xampp\htdocs.

3. Create a new database for WordPress

Reference: Using phpMyAdmin in Support page of wordpress.org

Open XAMPP Control Panel and run Apache and MySQL. Then access phpMyAdmin, localhost/phpmyadmin.
Create a new database for WordPress as below.

4. Connecting the database to WordPress

Access localhost/wordpress. In my case, the page is redirected to localhost/wordpress/wp-admin/setup-config.php.

Select language and go next page.

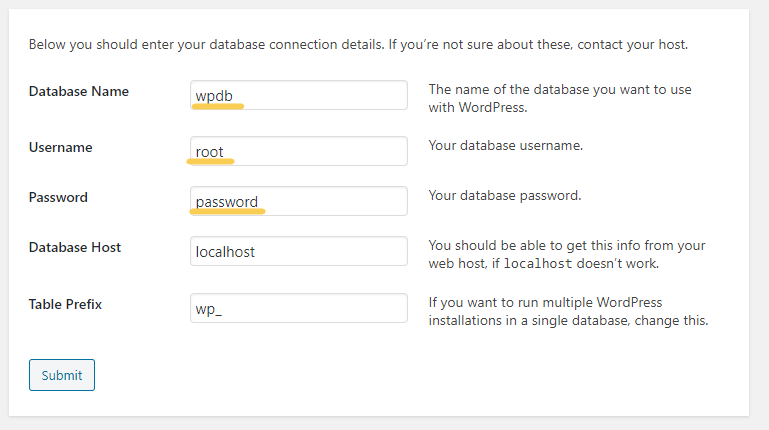
Input the data of your database and press Submit. Database Name is the database name you defined.

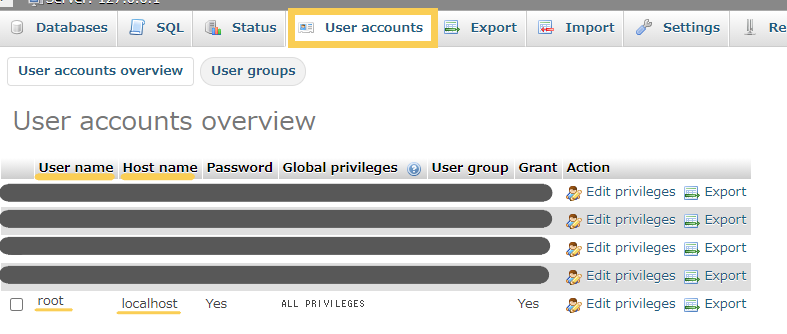
You can see Username, Password and Database Host in phpMyAdmin.

The connection to the database will be established. Press “Run the installation”.

5. Input information of your WordPress.

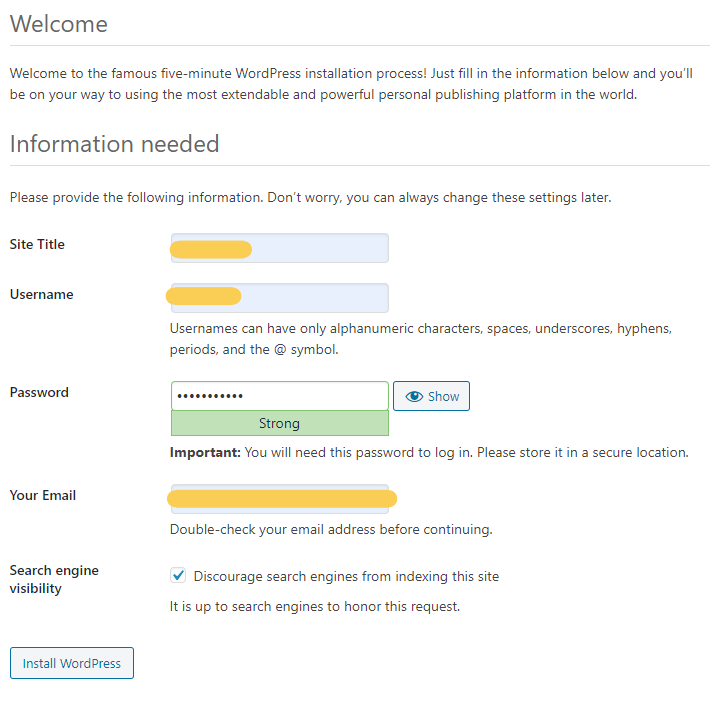
Input information of your new WordPress and press “Install WordPress”.

6. Confirm that you can login WordPress

You can login localhost/wordpress/wp-admin/ with Username and Password you defined at the last page.

Appendix

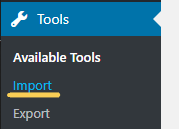
*You can import post, pages, comments, custom fields, categories, and tags from a WordPress export .xml file with Import tab.

How to use posted data in the same page

GOAL

To post the input data and display it on the same page with PHP.

Environment

Windows10
XAMPP 7.4.10

Preparation

1. Change the PHP program

Create a new PHP file “index.php” to submit data. You can see the details of this program in “How To Run PHP in XAMPP“.

<!DOCTYPE html>
<html>
<head>
	<meta charset="utf-8">
	<title>test</title>
</head>
<body>
	<form action="posted.php" method="POST">
		<label>Input message:</label>
		<input type="text" name="message" /> <input type="submit" value="Submit!" />
	</form>
</body>
</html>

2. Set action = “”

The action specifies the file to call. If you won’t move the page, action should be “”.

Method

Method 1. Use $_SERVER[‘REQUEST_METHOD’]

$_SERVER[‘REQUEST_METHOD’] is the variable to store the requested method. It returns the called requested method when the page is requested.

<body>
	<?php
	if ($_SERVER['REQUEST_METHOD'] === 'POST') {
    	echo "The input data is ".$message;
    }
    ?>
	<form action="" method="POST">
		<label>Input message:</label>
		<input type="text" name="message" /> <input type="submit" value="Submit!" />
	</form>
</body>

Method 2. Use $_POST directly

<body>
	<?php
	if ($_POST) {
    	echo "The input data is ".$_POST['message'];
    }
    ?>
	<form action="" method="POST">
		<label>Input message:</label>
		<input type="text" name="message" /> <input type="submit" value="Submit!" />
	</form>
</body>

The result is the same as above.

Method 3. Use isset($_POST[‘message’])

<body>
	<?php
	if ($_POST) {
    	echo "The input data is ".$_POST['message'];
    }
    ?>
	<form action="" method="POST">
		<label>Input message:</label>
		<input type="text" name="message" /> <input type="submit" value="Submit!" />
	</form>
</body>

The result is the same as above. The strong point of this method is that the existence of each keys of $_POST can be determined.