List Of Blender Properties
GOAL
Today’s goal is to list up property UI that can be used in Blender Addon.
Reference: Property Definitions
Environment
Blender 2.83(LTS)
Windows10
List of Properties
- BoolProperty
- BoolVectorProperty
- CollectionProperty
- EnumProperty
- FloatProperty
- FloatVectorProperty
- IntProperty
- IntVectorProperty
- PointerProperty
- StringProperty
How each property looks like
BoolProperty

bool: bpy.props.BoolProperty()
BoolVectorProperty
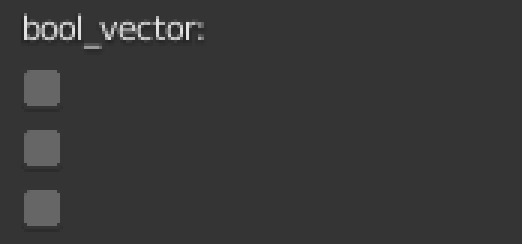
bool_vector: bpy.props.BoolVectorProperty()
subtypes of BoolVectorProperty
The UI style or label differs according to its subtype.
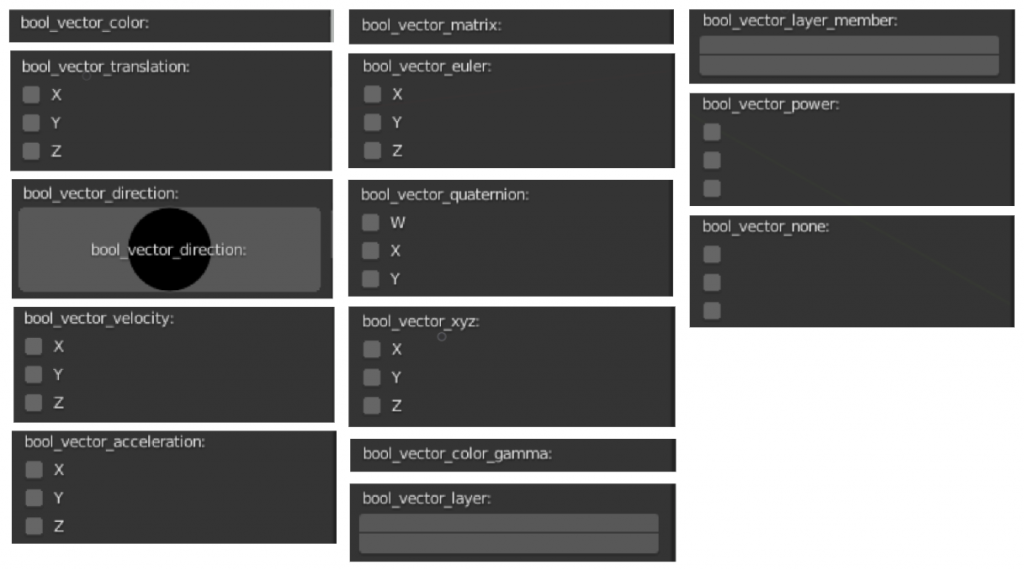
bool_vector_color: bpy.props.BoolVectorProperty(subtype='COLOR')
bool_vector_translation: bpy.props.BoolVectorProperty(subtype='TRANSLATION')
# and more...
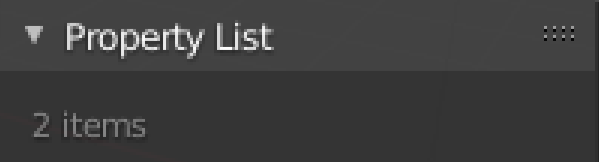
CollectionProperty
UILayout.prop() just shows the number of CollectionProperty. (Use “template_list” to show the item list of CollectionProperty)
class PropertySetTest(bpy.types.PropertyGroup):
    test_int: bpy.props.IntProperty()
    test_string: bpy.props.StringProperty()
collection: bpy.props.CollectionProperty(type=PropertySetTest)
EnumProperty
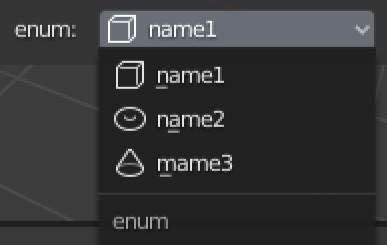
items = [("id1", "name1", "description 1", "MESH_CUBE", 0),
         ("id2", "name2", "description 2", "MESH_TORUS", 1),
         ("id3", "mame3", "description 3", "CONE", 2),]
enum: bpy.props.EnumProperty(items=items)
FloatProperty

float: bpy.props.FloatProperty()
subtypes of FloatProperty
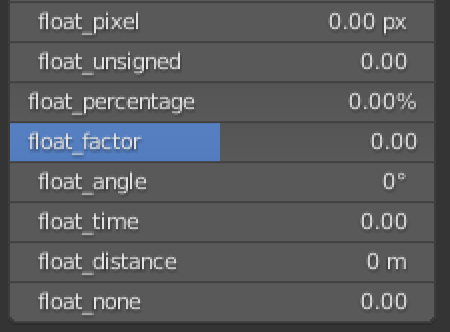
float_pixel: bpy.props.FloatProperty(subtype="PIXEL")
float_unsigned: bpy.props.FloatProperty(subtype="UNSIGNED")
# and more...
units of FloatProperty
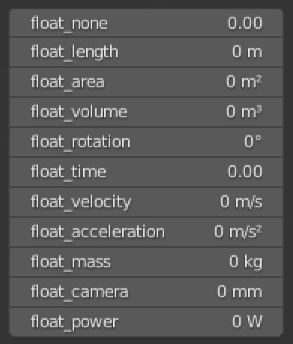
float_none: bpy.props.FloatProperty(unit='NONE')
float_length: bpy.props.FloatProperty(unit='LENGTH')
# and more...
FloatVectorProperty
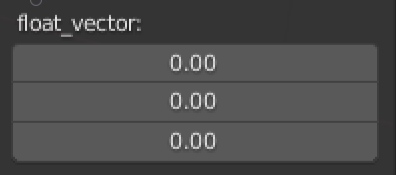
float_vector: bpy.props.FloatVectorProperty()
subtypes of FloatVectorProperty
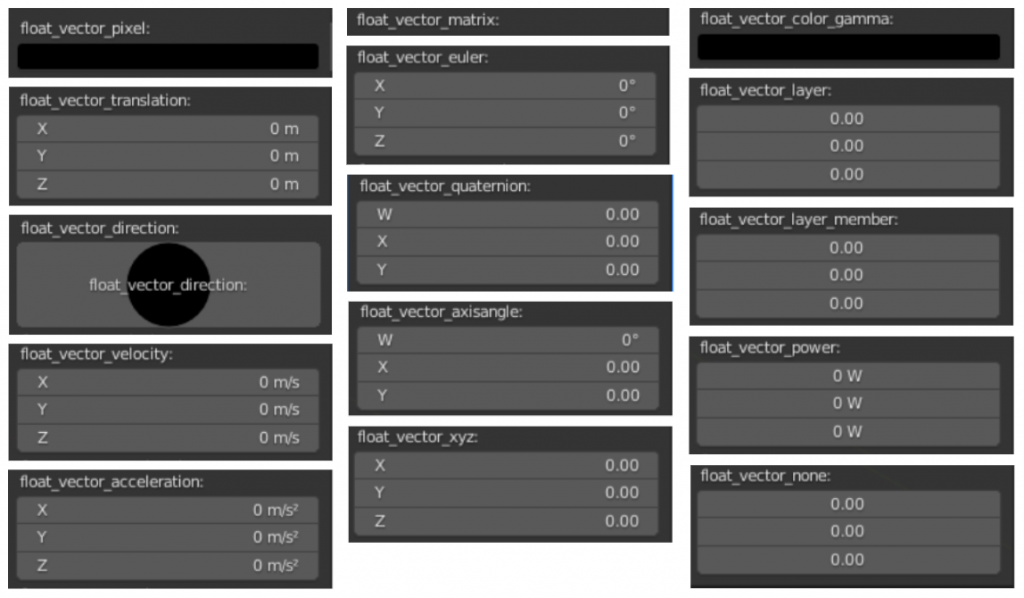
units of FloatVectorProperty

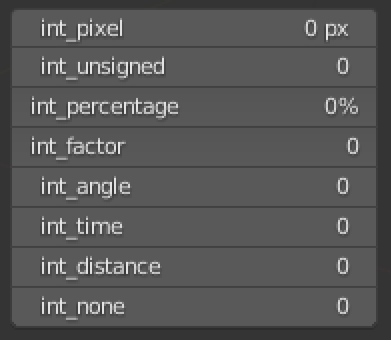
IntProperty

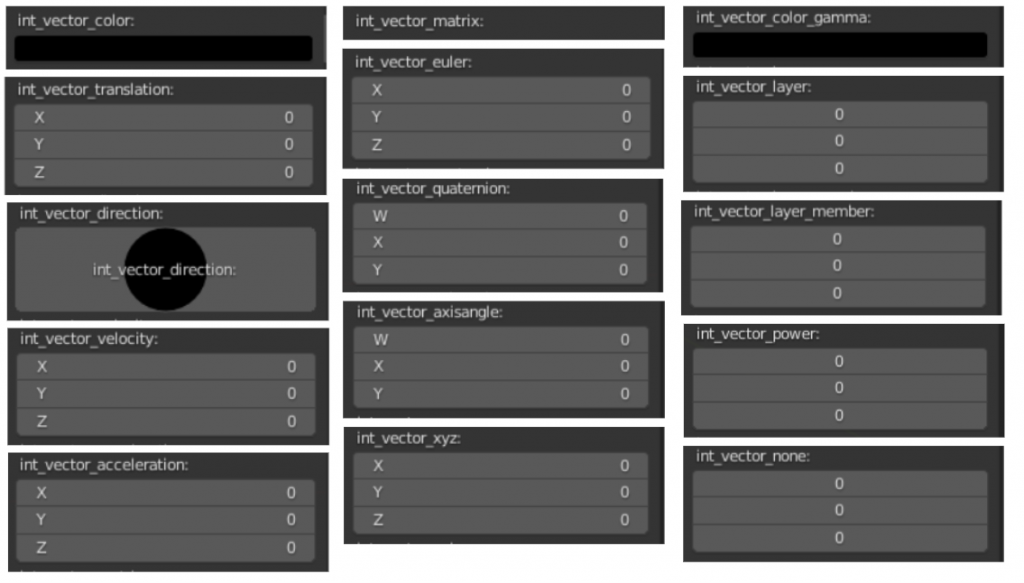
subtypes of IntVectorProperty
IntVectorProperty
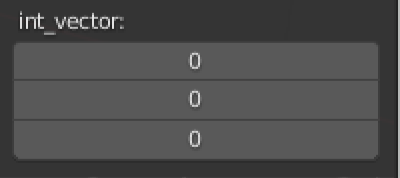
subtypes of FloatVectorProperty
PointerProperty
PointerProperty takes argument ‘type’ to set the type of pointer.
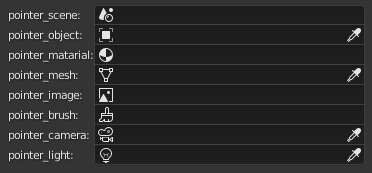
pointer_scene: bpy.props.PointerProperty(type=bpy.types.Scene)
pointer_object: bpy.props.PointerProperty(type=bpy.types.Object)
pointer_matarial: bpy.props.PointerProperty(type=bpy.types.Material)
pointer_mesh: bpy.props.PointerProperty(type=bpy.types.Mesh)
pointer_image: bpy.props.PointerProperty(type=bpy.types.Image)
pointer_brush: bpy.props.PointerProperty(type=bpy.types.Brush)
pointer_camera: bpy.props.PointerProperty(type=bpy.types.Camera)
pointer_light: bpy.props.PointerProperty(type=bpy.types.Light)
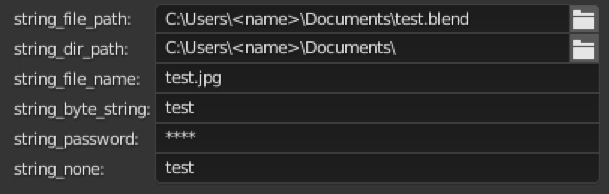
StringProperty

subtypes of FloatVectorProperty