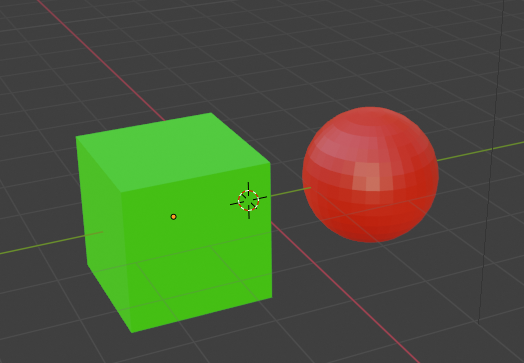
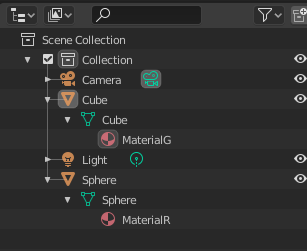
In this scene there are 3 materials that has 3 colors, red, green and blue. The red material and green material are set to objects.
The blue material is not used now, but how to delete unnecessary material, the blue one?
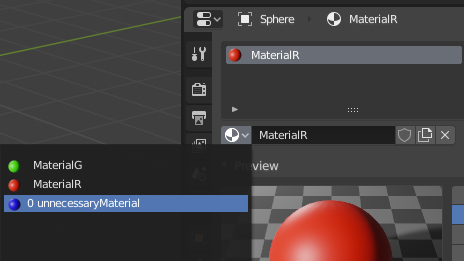
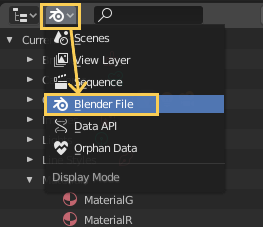
Method 1. Find the material from “Blender File” and delete it.
Change the Display Mode of the Outliner into “Blender File”.
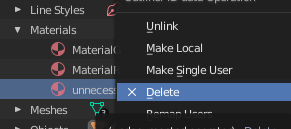
Open Material tab and right-click the material to delete.
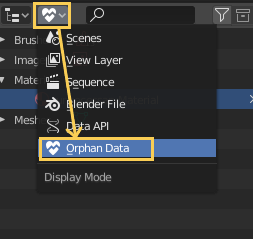
Method 2. delete materials in “Orphan Data”.
Change the Display Mode of the Outliner into “Orphan Data”. The items displayed in the display mode “Orphan Data” are items that are not used or connected to any other items.
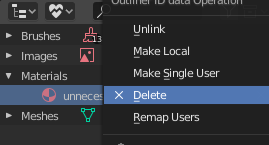
Open Material tab and right-click the material to delete.
Method 3. Reload the blender file.
Save the file and reopen it. All orphan data are automatically deleted when the file is reloaded.
When I compile c++ file using g++ command as below, the fatal error: numpy/arrayobject.h: No such file or directory occurred.
>g++ filename.cpp -std=c++11 -IC:\Python27\include -lpython2.7
In file included from filename.cpp:1:
../libs/matplotlibcpp.h:17:12: fatal error: numpy/arrayobject.h: No such file or directory
   17 | #  include <numpy/arrayobject.h>
matplotlibcpp.h in the source code is c++ header file to plot a graph.
numpy/arrayobject.h is in the directory C:\Python27\Lib\site-packages\numpy\core\include\numpy.
Cause
The compiler could not find arrayobject.h because that file is not included in the include search path.
Solution
Add the path to arrayobject.h using -I command line option as follows.
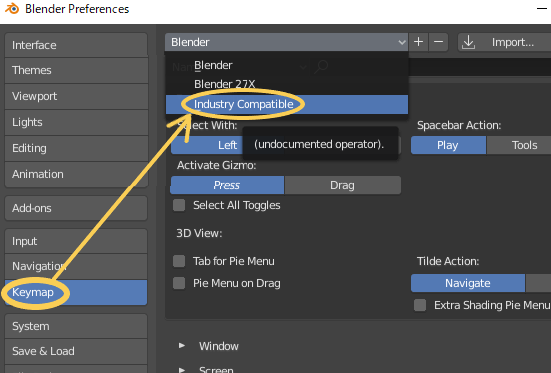
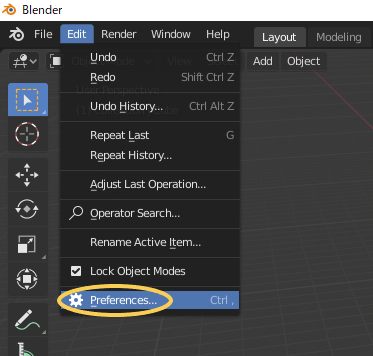
You can get “Maya Config Addon For Blender 2.8” from gumroad.com. It’s an addon to change UI of Blender and add original menu and tools allow users to use Blender like Maya.
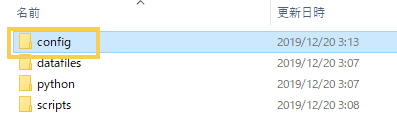
At first copy Blender for saving the current environment (Download .zip file of Blender from official site). Then place the unzipped file in the appropriate directory. I create a directory named “blender2.81maya”.
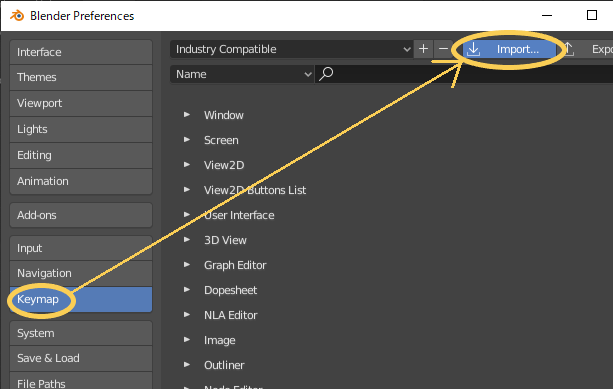
Copy MayaConfig_V3_4\config folder into the created directory(blender2.81maya\2.81).
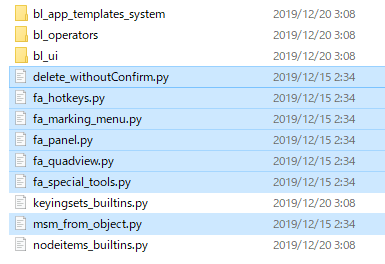
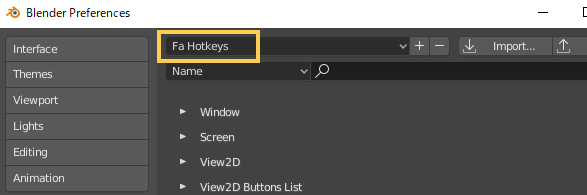
Copy all python files in MayaConfig_V3_4 into blender2.81maya\2.81\scripts\startup to add some menu and functions.
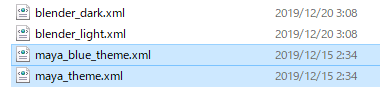
Copy files in MayaConfig_V3_4\Theme into blender2.81maya\2.81\scripts\presets\interface_theme to change interface theme.
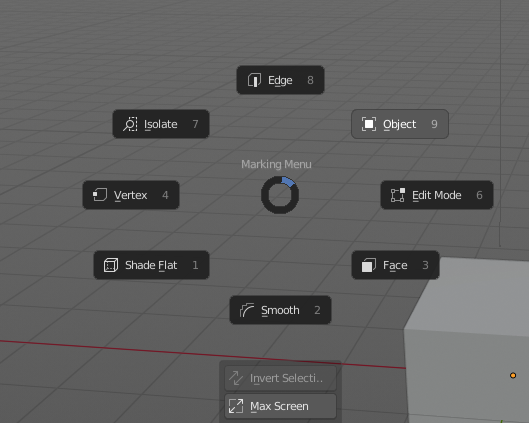
Start Blender
Click blender.exe in blender2.81maya folder when you use Maya-like Blender.
To set up the environment for After Effects plugin. To build sample plug-in and execute it.
Environment
Adobe CC2019 v16.0.0 Windows10 with environment for C++ compile Microsoft Visual C++ 2017 ver15.8.4
Method
1 Download The After Effects SDKs
Access Adobe Web site and click “Get the SDKs” button to get After Effects SDKs. Select “After Effects Plug-in SDK” for your AE version.
2 Set build path as environment variable
Add environment variable “AE_PLUGIN_BUILD_DIR” and set output directory. If it doesn’t exist, the error “fatal error LNK1104: cannot open file ‘***.aex” will occur.
3 Build sample plug-in
Unzip “After+Effects+CC+16.0+Win+SDK.zip” and put the unzipped directory “AfterEffectsSDK” into appropriate location.
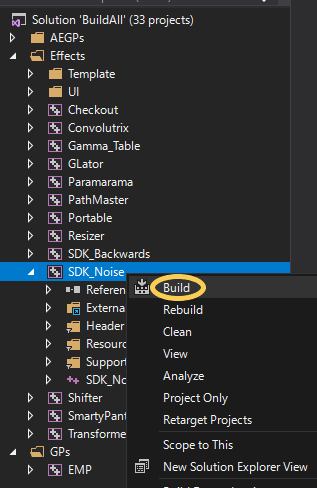
Open AfterEffectsSDK\Examples\BuildAll.sln then Visual studio will start.
Add the 3 directories, \devkit , \mkspecs in devkitBase into Maya installation directory (e.g. C:\Program Files\Autodesk\Maya2018).
* To compile custom plug-ins, you can also find the C++ API header files(\include\maya ) and libraries(\lib).
Build enclosed plug-ins in Visual Studio
Open devkit/plug-ins folder( either maya installation folder or newly created folder where plug-in folder is copied and put would be fine). I create a folder named “maya_cpp_plugin” and copy plug-in files to the new folder.
Find “Hello World Cmd” and open it.
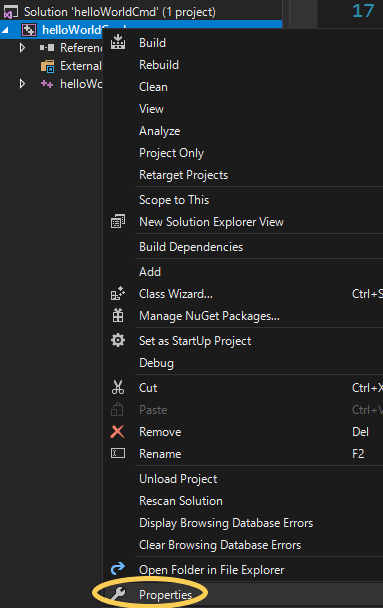
Add folder “include” into the list of include directories for Visual Studio. Right Click the name of project name and open Properties.
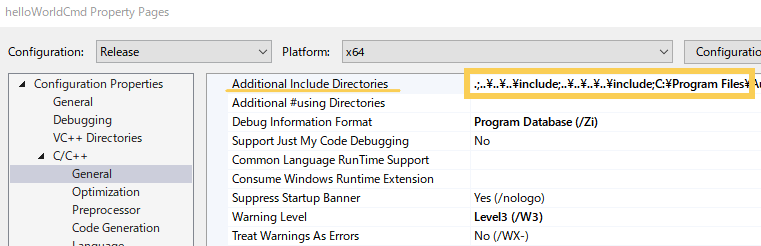
Then, add ” C:\Program Files \ Autodesk\Maya2018\include” into the Additional Include Directories.
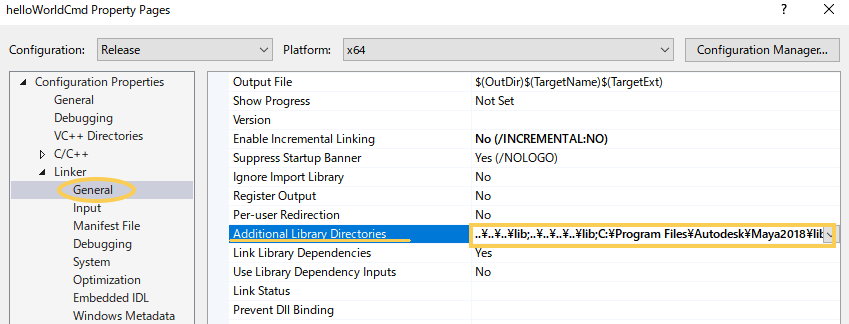
Add ” C:\Program Files\Autodesk\Maya2018\lib” into Additional Library Directories.
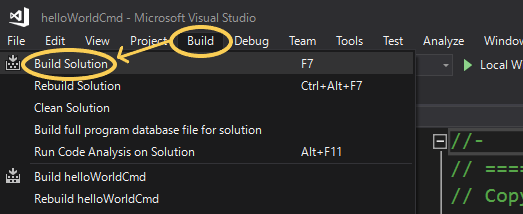
Open solution file *.sln, then Visual Studio will start up. Click Build > Build Solution.
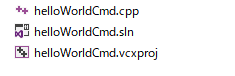
The output files are in the directory maya_cpp_plugin\helloWorldCmd\x64\Release(or Debug). “helloWorldCmd.mll” is the main plugin file.
Add plugin helloWorldCmd.mll to the plug-in directory defined as MAYA_PLUG_IN_PATH in <username>\Documents\maya\<version>\Maya.env file. If Maya.env doesn’t exist, create it according to “Setting environment variables using Maya.env“.
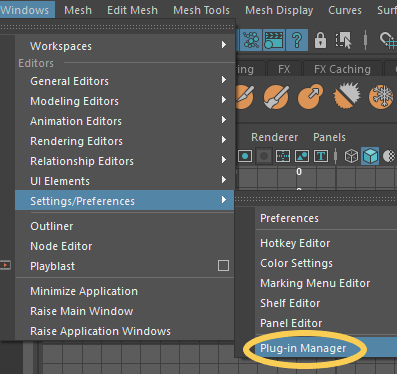
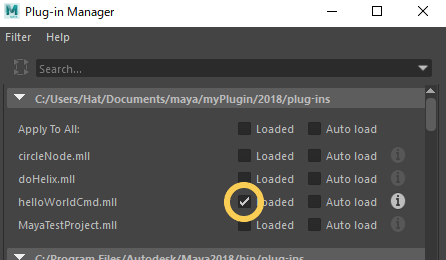
Start Maya and open Plug-in Manager.
Click a check mark next to helloWorldCmd.mll
Execute the Plug-in with command
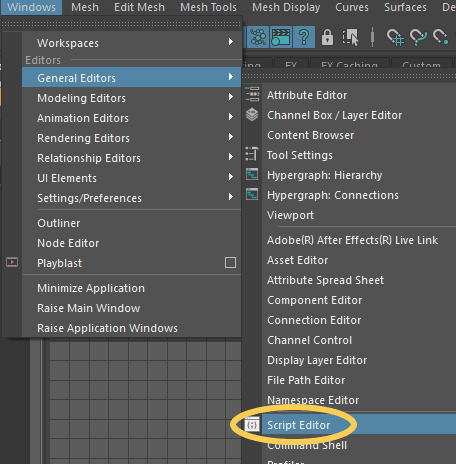
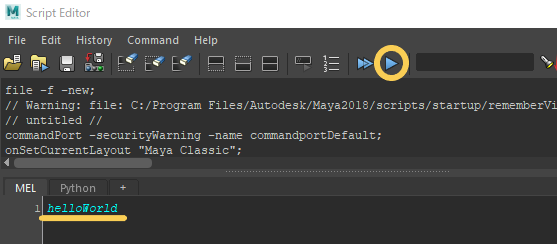
Open Script Editor and execute the Command “helloWorld”.
The message “helloWorld” is displayed on the console, upper side of the Script Editor.
To install g++ in Windows10 and compile a c++ file. g++ is included in
What is g++?
g++ is the command to compile c++ and the name of C++ compiler included in GCC, the GNU Compiler Collection. You can use g++ on GNU such as Cygwin and MinGW.
Method
I’ll use MinGW
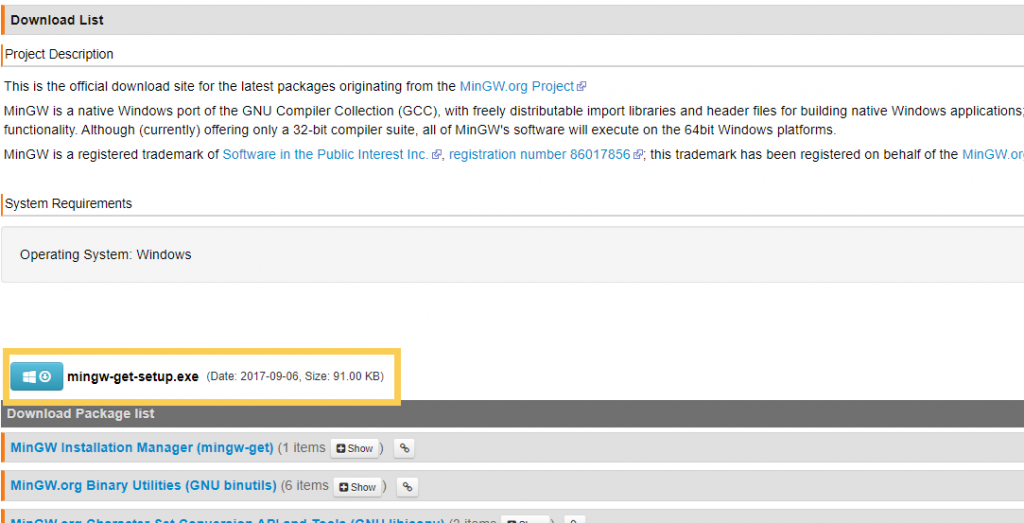
Get mingw-get-setup.exe
Access the MinGW web site and go to the Downloads page. Click and downloads mingw-get-setup.exe.
Copy Skeleton template from “AfterEffectsSDK\Examples\Template\Skeleton” , with directory hierarchies of “Skeleton”, “Headers”, “Resources” and “Util” preserved .
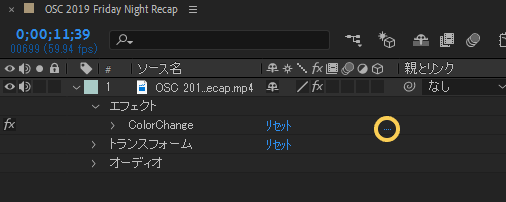
Rename file names and replace “Skeleton” with “Color Change” in it. DON’T rename “SkeletonPiPL.rc” because binary .rc file is automatically generated from .r file (AE Plugin SDK Guide “PiPL Resources”).
EffectMain Function
Main function is defined in SkeletonPiPL.r as follows.
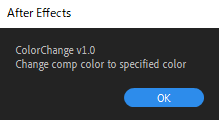
EffectMain is the Function accepts PF_Cmd cmd as a parameter and call functions using cmd as a selector such as “PF_Cmd_ABOUT”, “PF_Cmd_PARAMS_SETUP” and “PF_Cmd_RENDER”. Refer to “AE Plugin SDK Guide command selectors.”
The iterate function scan input flame and calculate output frame as pixel to pixel operation, pixel function. In this case, the pixel function is “MySimpleGainFunc16” or “MySimpleGainFunc8”. Rename and change them into “MyColorChangeFunc16” and “MyColorChangeFunc8”.
if (PF_WORLD_IS_DEEP(output)){
paramDataP.color16.red = CONVERT8TO16(paramDataP.color.red);
paramDataP.color16.green = CONVERT8TO16(paramDataP.color.green);
paramDataP.color16.blue = CONVERT8TO16(paramDataP.color.blue);
paramDataP.color16.alpha = CONVERT8TO16(paramDataP.color.alpha);
ERR(suites.Iterate16Suite1()->iterate(
in_data,
0, // progress base
linesL, // progress final
¶ms[COLORCHANGE_INPUT]->u.ld, // src
NULL, // area - null for all pixels
(void*)¶mDataP, // refcon - your custom data pointer
MyColorChangeFunc16, // pixel function pointer
output));
}else {
ERR(suites.Iterate8Suite1()->iterate(
in_data,
0, // progress base
linesL, // progress final
¶ms[COLORCHANGE_INPUT]->u.ld, // src
NULL, // area - null for all pixels
(void*)¶mDataP, // refcon - your custom data pointer
MyColorChangeFunc8, // pixel function pointer
output));
}
“MathJax-LaTeX” is the plugin for rendering of embedded LaTeX or MathML in HTML pages. It convert LaTeX style code ” \int^{ \infty}_{a} f(x) dx = \lim_{n \to \infty} \int^{n}_{a} f(x) dx” into the formula as below. $$\int^{ \infty}_{a} f(x) dx = \lim_{n \to \infty} \int^{n}_{a} f(x) dx$$
Input shortcode
Input shortcode “mathjax” on your post. (Input mathjax with [ and ])
Input formula
Input LaTex style code of the formula enclosed in $$s.
Trouble shooting
If the shortcode “mathjax” doesn’t work well, open “Plugins” panel and click the setting of “MathJax-LaTeX” on your Dashboard. Check the “Force Load”.