add_action( 'wp_head', 'header_customize');
function header_customize() {
	$header_tags = <<<EOM

	<!--ADD YOUR HTML HERE such as <script src="..."></script>-->

	EOM;
	echo $header_tags;
}
The argument function header_customize() is added when wp_head() is called in functions.php of parent theme as below.
<?php wp_head(); ?>
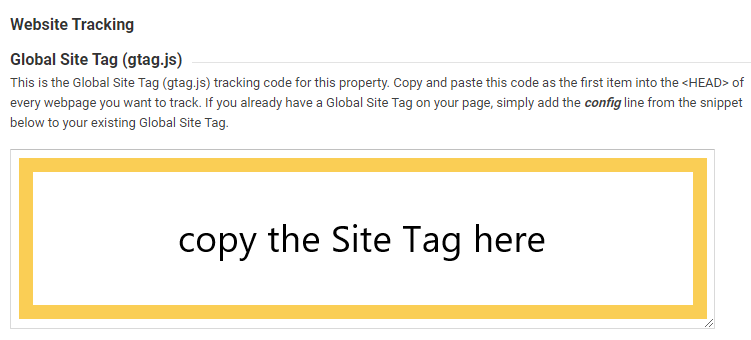
You can see the code written in the source of your website.
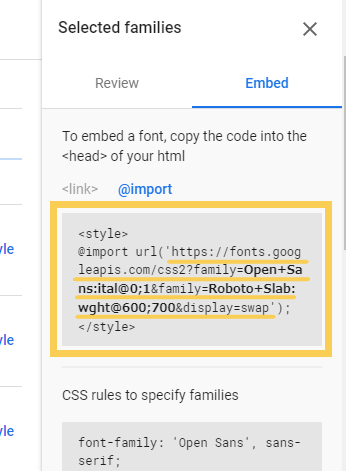
Change the default font of your theme in WordPress to google fonts.
Environment
WordPress 5.5.1 Theme: Sparkling (I have child-theme sparkling-child)
What is Google Fonts?
Google font is abundant font set that can be used in websites without install and upload. It can be used by just putting code in your HTML.
We believe the best way to bring personality and performance to websites and products is through great design and technology. Our goal is to make that process simple, by offering an intuitive and robust collection of open source designer web fonts.
To understand What child themes in WordPress is and create it
Environment
WordPress 5.5.1 Theme: Sparkling
What is Theme and child-theme in WordPress
What is theme?
WordPress Themes can provide much more control over the visual presentation of your content and other data on your WordPress site, as well as behavior of certain site’s elements while interacting with visitors.
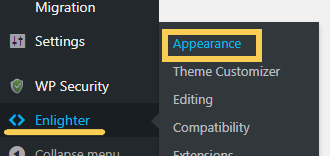
And you can customize the themes from Appearance>Customize.
What are themes made of?
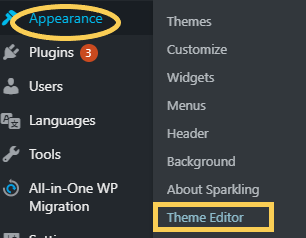
The following is an example of file construction of the theme. You can see these files from Appearance>Theme Editor.
Required files
index.php: the main template file
style.css
Additional files
PHP files
template files such as header.php, page.php, sidebar.php and 404.php
Localization files: this is used for translating an internationalized theme
CSS files
bootstrap.css, flexslider.css, etc
Graphics
JavaScript
customizer.js, functions.js, flexslider-custom.js, etc.
Text files
license.txt, readme.txt, etc.
What is child-theme?
As indicated in the overview, a child theme inherits the look and feel of the parent theme and all of its functions, but can be used to make modifications to any part of the theme. In this way, customizations are kept separate from the parent theme’s files.
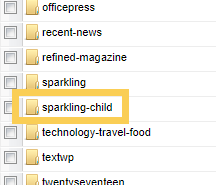
Create a new directory in wp/wp-content/themes and named it “<theme name>-child”. In my case, the name is sparkling-child.
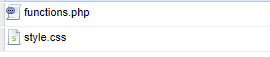
2. Create a stylesheet: style.css
Create style.css in <theme name>-child directory. And write information at the top of style.css as below. “Theme URI” is the path to the child theme in the server and “Template” is the directory name of the parent theme. “Theme Name” needs to be unique.
/*
 Theme Name:   Sparkling Child
 Theme URI:    http://example.com/sparkling-child/
 Description:  Sparkling Child Theme
 Author:       Nako
 Author URI:   http://example.com
 Template:     sparkling
 Version:      1.0.0
 License:      GNU General Public License v2 or later
 License URI:  http://www.gnu.org/licenses/gpl-2.0.html
 Tags:         blog
 Text Domain: sparklingchild
*/

/* Add your css here*/
3. Enqueue stylesheet
Create functions.php in <theme name>-child directory. And write the function to enqueue stylesheets of the parent theme.
If the parent theme has some css in addition to ‘/style.css’, you should contain them in theme_enque_styles(). If the stylesheet of the child theme doesn’t loaded automatically, you should enqueue ‘child-style’ in theme_enque_styles().
4. Install and customize child theme
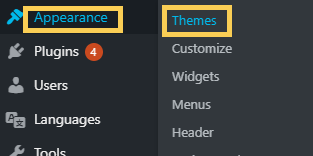
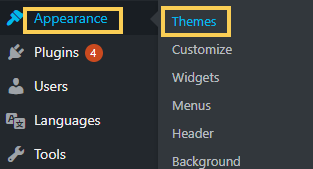
Open Appearance>Themes in Dashboard.
Then select the child-theme you created and customize it.
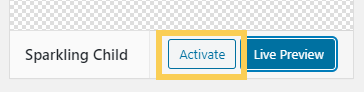
5. Activate child theme
Appendix
The order of style sheet to read will changed if child-theme is added. So you should move some additional css from the parent style.css to child style.css.
When only parent theme is used, sparkling/style.css is loaded after loading font (Google Fonts). You can use the font in parent sparkling/style.css.
When child theme is used in addition to parent theme, sparkling/style.css is loaded at first and font (Google Font) is load after that. You can’t use the font in parent sparkling/style.css.
So you should put css related to the font in sparkling-child/style.css or read every stylesheet in sparkling-child/function.php.
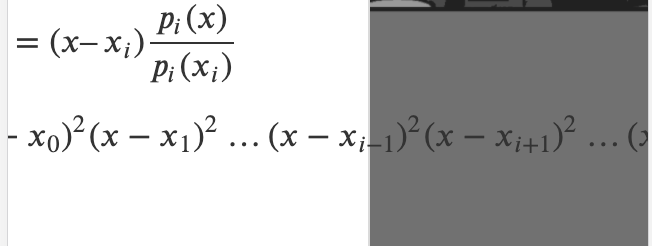
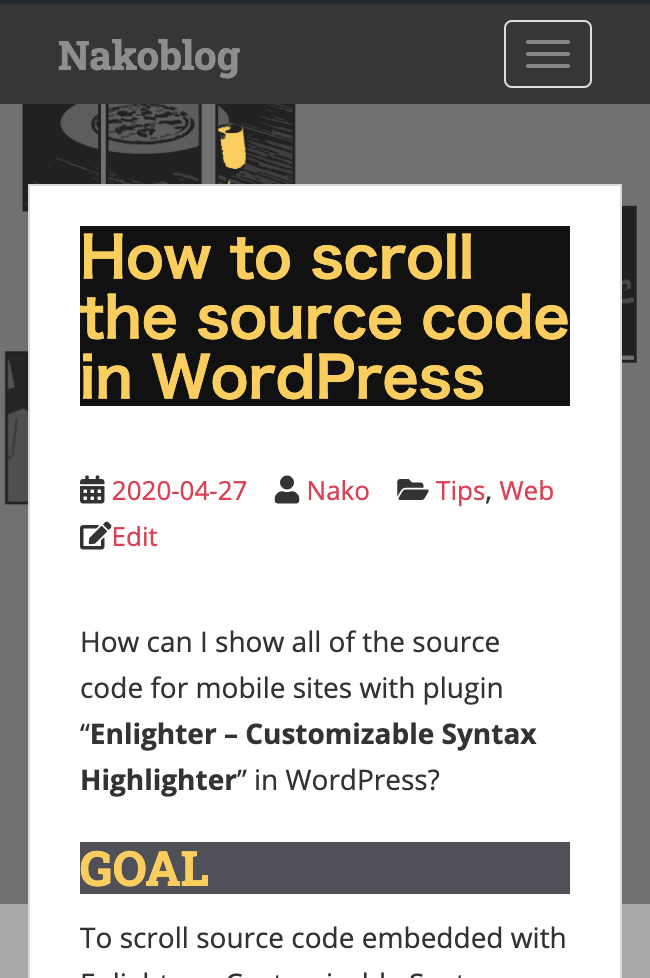
The page size is expanded by mathematical formula. (For example, an article “What is Hermite interpolation?” has long formula)
How I found it…
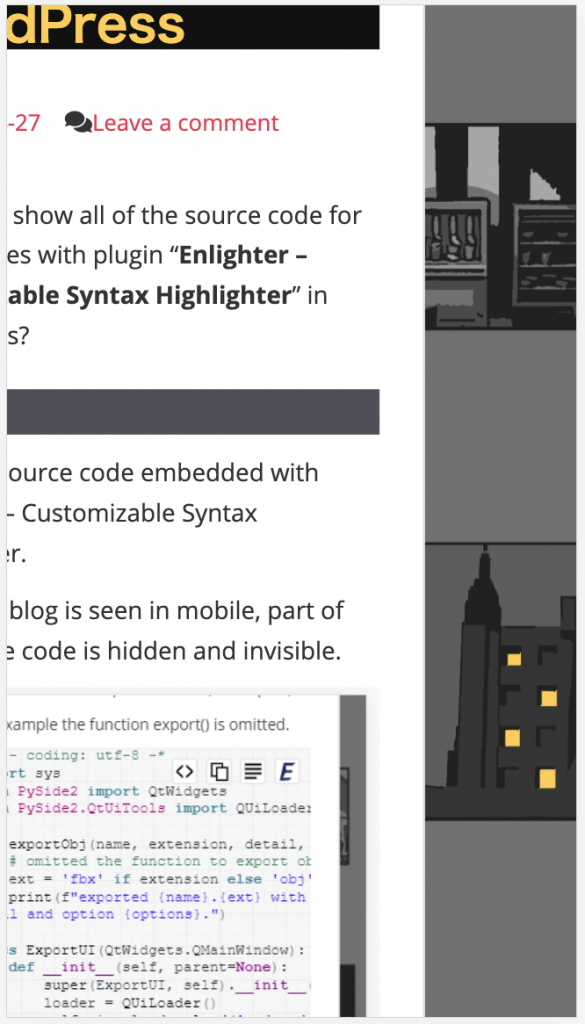
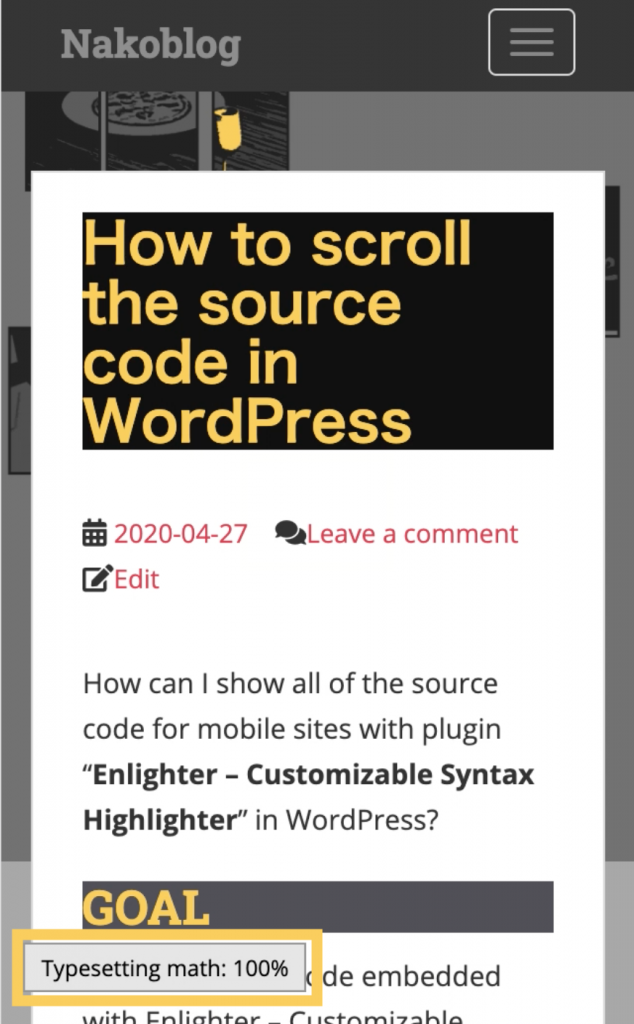
In my case, though the width of main html is fit to the display the width of the whole page is expanded for some reasons. And it doesn’t occur when single article is opened (you can see the size of background is fit to the display as below).
I found that the change of the width happens with a time lag after main header and footer are loaded. I captured display and find that the change happened just after “Typesetting math” process completed.
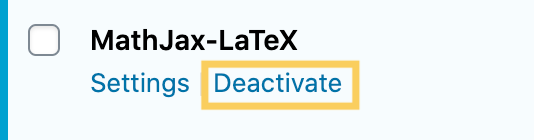
This process is creation of the formula with the greatly useful plugin “MathJax-LaTeX“. When “MathJax-LaTeX” plugin is deactivated, the size of the page fit to the display.
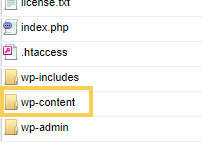
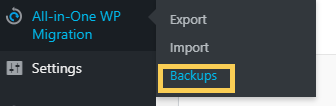
Open “wp” directories and download “wp-content” directory that contains all uploaded files such as images and videos, plugins and themes installed. wp-includes and wp-admin can be recovered from WordPress.org.
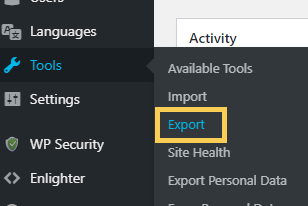
“wp-content” doesn’t contain text and information of the articles. It is saved in the SQL database. You can download it by clicking Tools>Export in Dashboard.
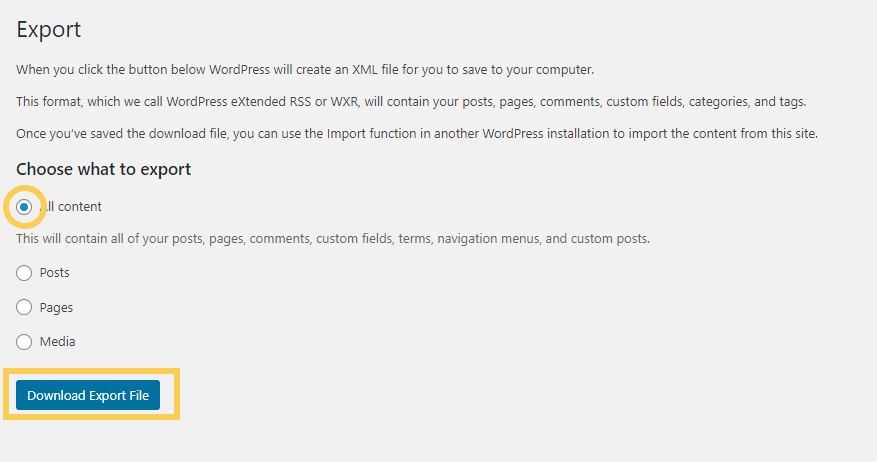
Then select “All content” and click “Download Export file” button.
To understand what QtCreator is and how to use it.
What is Qt and PySide?
Qt is a cross-platform application framework with many modules providing services like network abstraction and XML handling, along with a very rich GUI package. Check the article “First PySide Application” for details of Qt and PySide.
What is Qt Designer?
Qt Designer is the Qt tool for designing and building GUIs with Qt Widgets. Qt Designer makes it easy to layout UI widgets with PySide. Reference: Qt Designer Manual
You can find the directory “PySide2” by PySide2.__file__
import PySide2
print(PySide2.__file__)
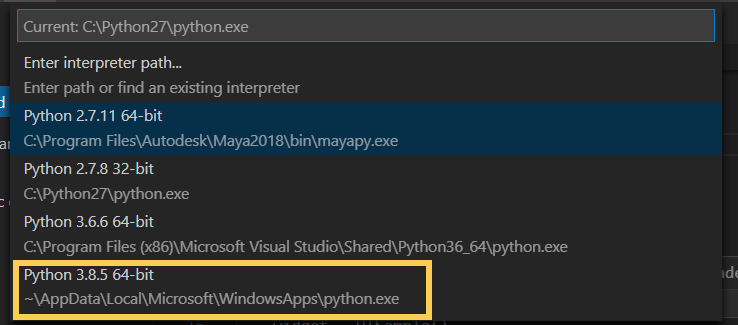
Or you can find the python directory with the command below.
C: >where python
If you are using Python2, designer.exe exists in Python2\Lib\site-packages\PySide directory.
Create Dialog
1. Create a new form
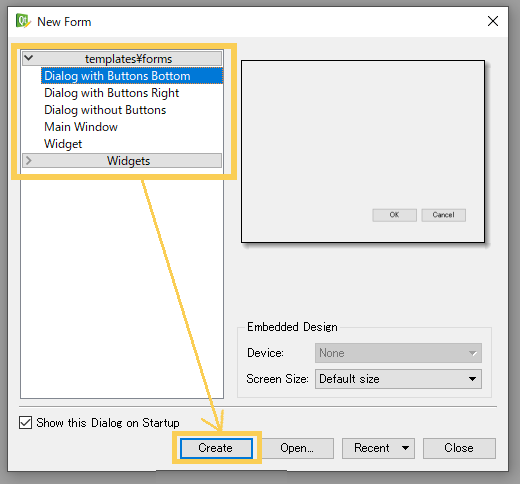
When you start the designer.exe, the “New Form” window will open automatically. If not, click File > New
Select any template you like and click the button “Create”.
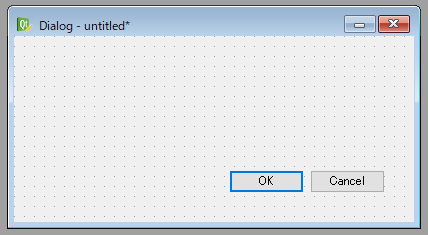
An empty untitled widget with “OK” and “Cancel” buttons will appear.
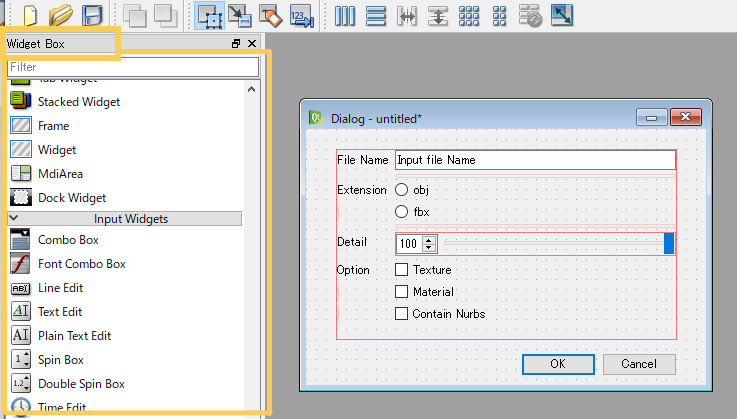
2 Put the widget on the empty Dialog
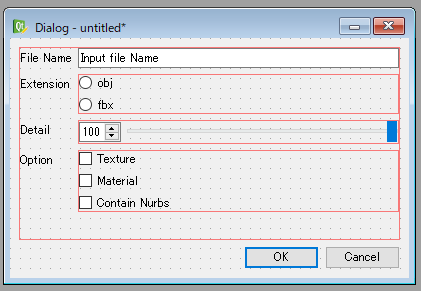
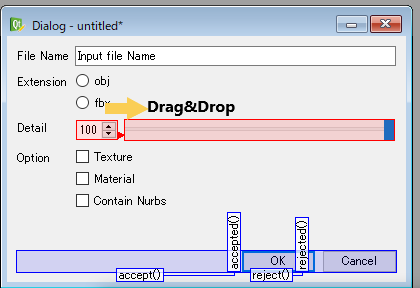
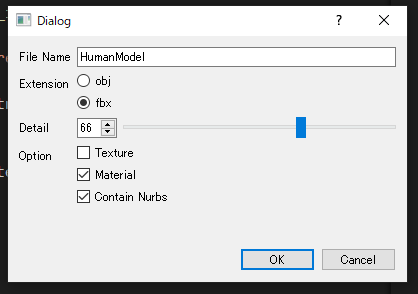
Drag & Drop any widget you like from “Widget Box” and put it into the empty Dialog. I created a dialog to export reduced object in DCC tool.
from Qt Designer
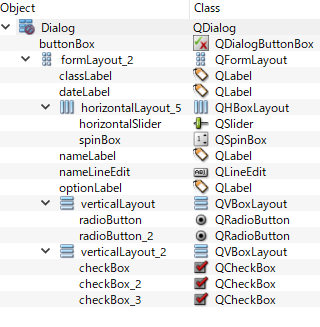
The construction of this form is the following.
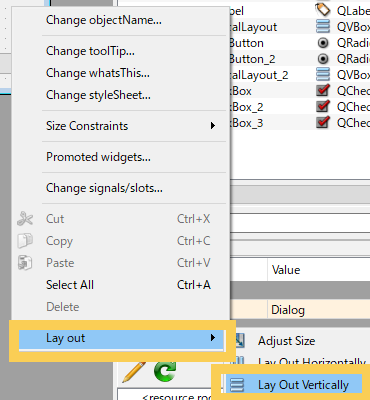
And reform the widgets in main layout. Right-click on the form outside of the form Layout and click layout>Lay Out Vertically.
The widgets are arranged at even intervals in the main layout.
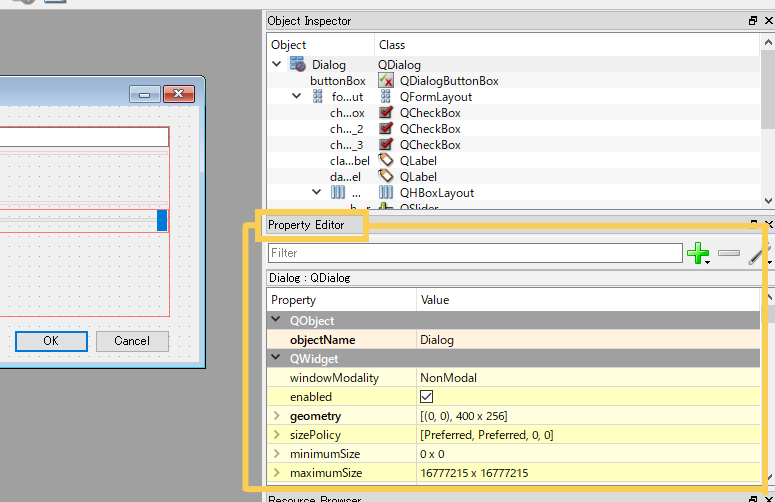
Set the default values and change settings of each property with “Property Editor.”
from Qt Designer
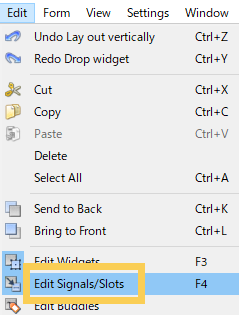
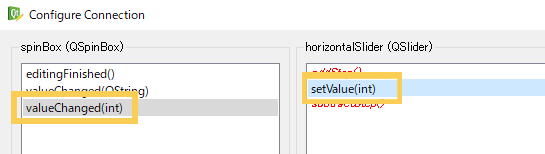
3. Connect the signals to the slots
In Qt Designer, you can connect the signal of the widget to the slot of another widget, in other words connect some widgets as input and output. In this case, Spin Box and Horizontal Slider should move in conjunction with each other.
Change the mode to edit signals/slots by clicking Form>Edit Signals/Slots.
Drag & drop from Spin Box to Horizontal Slider.
The signal is valueChanged and the connected slot is setValue.
In contrast, drag & drop from Horizontal Slider to Spin Box and connect them in the same way.
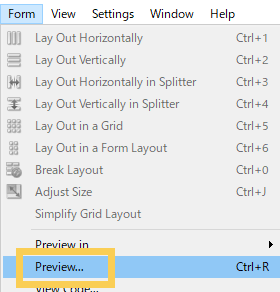
4. Preview
Preview the form you created by Form>Preview… and check if it works well.
5. Save the UI as Designer UI files (.ui)
Save the dialog you created as “reduced_export.ui”.
Load .ui from Python file
You can load .ui file you created from python file.
Run the program below and the dialog you created will be displayed.
# -*- coding: utf-8 -*
import sys
from PySide2 import QtWidgets
from PySide2.QtUiTools import QUiLoader

if __name__ == '__main__':
    app = QtWidgets.QApplication(sys.argv)
    loader = QUiLoader()
    widget = loader.load('reduced_export.ui', None)
    if not widget:
        print(loader.errorString())
        sys.exit(-1)
    widget.show()
    sys.exit(app.exec_())
Or define ExportUI class that inherits QMainWindow.
class ExportUI(QtWidgets.QMainWindow):
    def __init__(self, parent=None):
        super(ExportUI, self).__init__(parent)
        loader = QUiLoader()
        self.ui = loader.load('reduced_export.ui')
        if not self.ui:
            print(loader.errorString())
            sys.exit(-1)
        print("OPEN")
    def getUi(self):
        return self.ui

if __name__ == '__main__':
    app = QtWidgets.QApplication(sys.argv)
    exportUi = ExportUI()
    widget = exportUi.getUi()
    widget.show()
    sys.exit(app.exec_())
Connect functions you defined to the widgets
When the “OK” button is clicked, or the buttonBox widget is accepted, call the function export() that is the function to export the selected object in DCC tools. You can connect them by using “self.ui.buttonBox.accepted.connect(self.export)”.
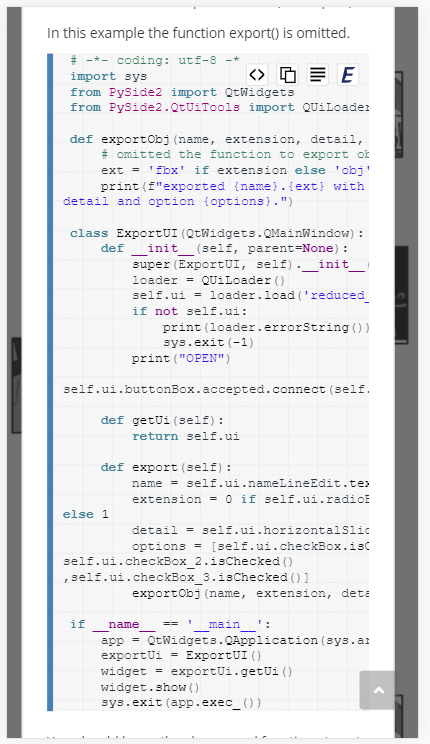
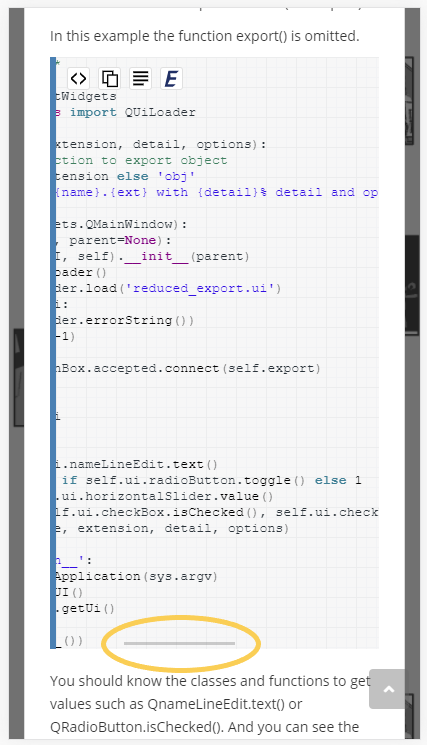
In this example the function export() is omitted.
# -*- coding: utf-8 -*
import sys
from PySide2 import QtWidgets
from PySide2.QtUiTools import QUiLoader

def exportObj(name, extension, detail, options):
    # omitted the function to export object
    ext = 'fbx' if extension else 'obj'
    print(f"exported {name}.{ext} with {detail}% detail and option {options}.")

class ExportUI(QtWidgets.QMainWindow):
    def __init__(self, parent=None):
        super(ExportUI, self).__init__(parent)
        loader = QUiLoader()
        self.ui = loader.load('reduced_export.ui')
        if not self.ui:
            print(loader.errorString())
            sys.exit(-1)
        print("OPEN")
        self.ui.buttonBox.accepted.connect(self.export)

    def getUi(self):
        return self.ui

    def export(self):
        name = self.ui.nameLineEdit.text()
        extension = 0 if self.ui.radioButton.toggle() else 1
        detail = self.ui.horizontalSlider.value()
        options = [self.ui.checkBox.isChecked(), self.ui.checkBox_2.isChecked() ,self.ui.checkBox_3.isChecked()]
        exportObj(name, extension, detail, options)

if __name__ == '__main__':
    app = QtWidgets.QApplication(sys.argv)
    exportUi = ExportUI()
    widget = exportUi.getUi()
    widget.show()
    sys.exit(app.exec_())
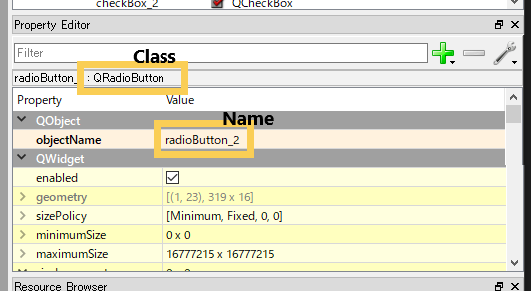
You should know the classes and functions to get values such as QnameLineEdit.text() or QRadioButton.isChecked(). And you can see the class and the name of each widget in Property Editor of Qt Designer.
Run
Run the python code above and set the values on the displayed dialog.
Click the “OK” button. Then the message below will be displayed on the console.
exported HumanModel.fbx with 66% detail and option [False, True, True].
Other tools for Qt programming
QtCreator
QtCreator is C++ IDE for development with Qt. It has an editor with useful functions, navigation tools, GUI tools for UI design and so on. Reference: Qt Creator Manual
Qt Linguist
Qt Linguist is a tool for translating Qt C++ and Qt Quick applications into local languages. Reference: Qt Linguist Manual
Qt Assistant
Qt Assistant is a tool for viewing on-line documentation for Qt programming. Reference: Qt Assistant Manual
To understand Qt and PySide(PySide2) and create PySide application that
Emvironment
WIndows10 Python2.7.8
*I use python2 because python3 can’t be used in Maya, but I think python3 is better for general application development. And PySide2 which is used in Maya2017~ is easy to use in python3.
What is Qt?
Qt is a cross-platform application framework with many modules providing services like network abstraction and XML handling, along with a very rich GUI package.
Though Qt is developed in C++, it can be used in Python, Java, Perl and so on with API. The application developed with Qt can be executed in any platform such as Windows, Linux, macOS, desktop and mobile.
Qt has been upgraded constantly, and the latest version in 2020 is Qt5.
What is PySide?
PySide is the python module as a Python binding of Qt. Functions, variables and modules of Qt can be used in Python via PySide. GUI application can be developed on multi platform, windows, Linux and macOS using Python with PySide.
PySide and Pyside2
PySide2 is upgraded PySide. PySide2 provides access to the Qt 5 framework while PySide provide access to Qt4 or below. Qt4 and PySide can be used in Maya2016 and before, Qt5 and PySide2 is used in Maya2017 and after.
If you are using python2, it’s easy to install PySide by using pip install, but you should build PySide2 by yourself. So If you want to use PySide2, please use python3 and its pip install.
The difference between PySide and PyQt
PyQt is also one of the python modules as a Python binding of Qt. The document “Differences Between PySide and PyQt” is clear and detailed. And “PyQt vs Pyside” is easy to understand their advantages and disadvantages.
Method
The following is the method to create your first PySide application. This is for PySide so please replace words for PySide2 if you need.
Install PySide
Open Command prompt and input pip command. In my case, ‘pip2’ is used because python3 is installed and the command just ‘pip’ is equal to pip3.
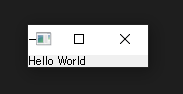
This is an application program to display HelloWorld.
import sys
from PySide.QtCore import *
from PySide.QtGui import *

#Create QApplication
firstApp = QApplication(sys.argv)
# Create a Label
label = QLabel("Hello World")
label.show()
# Enter Qt application main loop
firstApp.exec_()
sys.exit()
Execute and small window will appear.
QtGui
QtGui module contains classes that control widgets of PySide. Widget is a UI component that is used in GUI application such as button, label, Matrix, Layout and so on. You can see all class in PySide.QtGui.
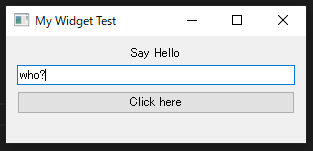
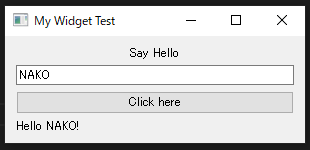
Create Widget
You can create original widget as a Class. Add single widgets into QVBoxLayout.