How To Use Human Meta-Rig in Rigify
GOAL
Today’s goal is to summarize the rigging method of Human Meta-Rig with Rigify addon in Blender.
I used a human model with MakeHuman.
Environment
Blender 2.83
Windows10
Method
1. Add Human meta rig
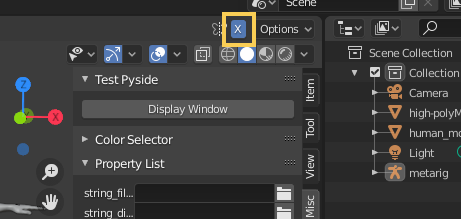
Activate addon “RIgging: Rigify” at first.
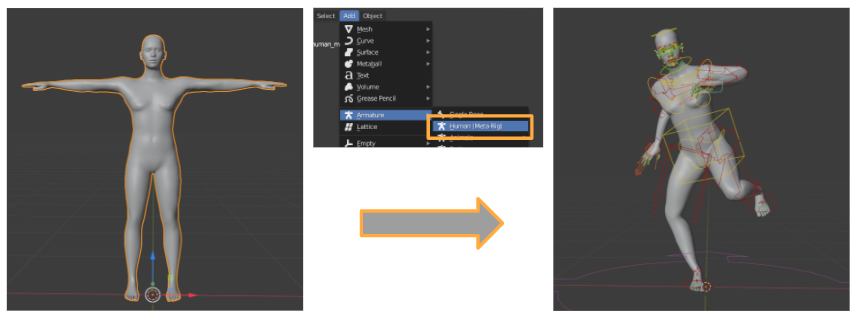
Import the model with Y-axis front.
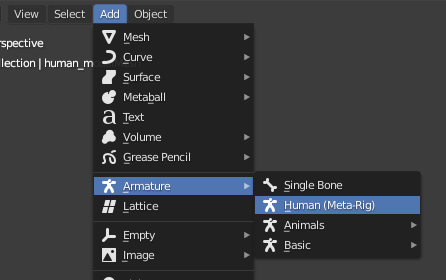
Change the mode to “Object Mode” and click Add > Armature > Human(Meta-Rig).
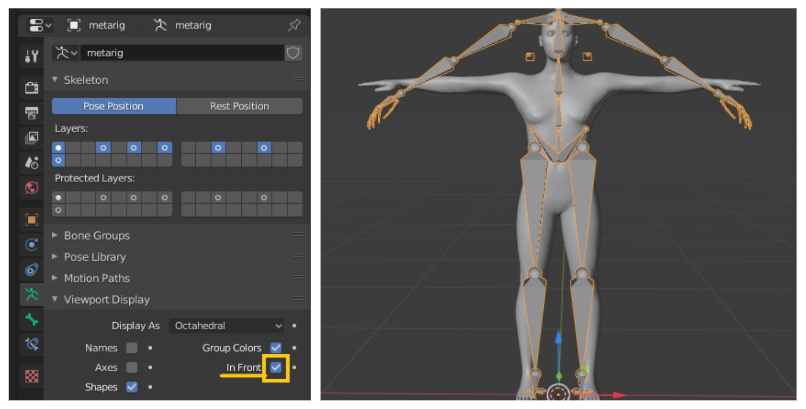
Open metarig tab > Viewport Display and check “In Front” on to show the rig in front of all in the 3D View.
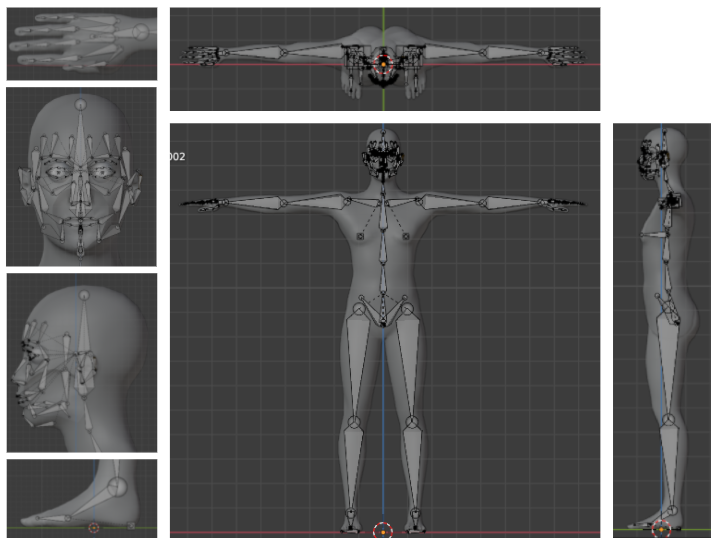
2. Adjust bones
Adjust rig size and locations of bone to fit the target mesh.
Don’t change the transforms of the object. Be sure to change transforms in “Edit Mode” not in “Object Mode“.
It is better to apply mirroring If the target is symmetry model.
3. Generate Rig
Click “Generate Rig” button to generate rig and its controller with IK/FK.

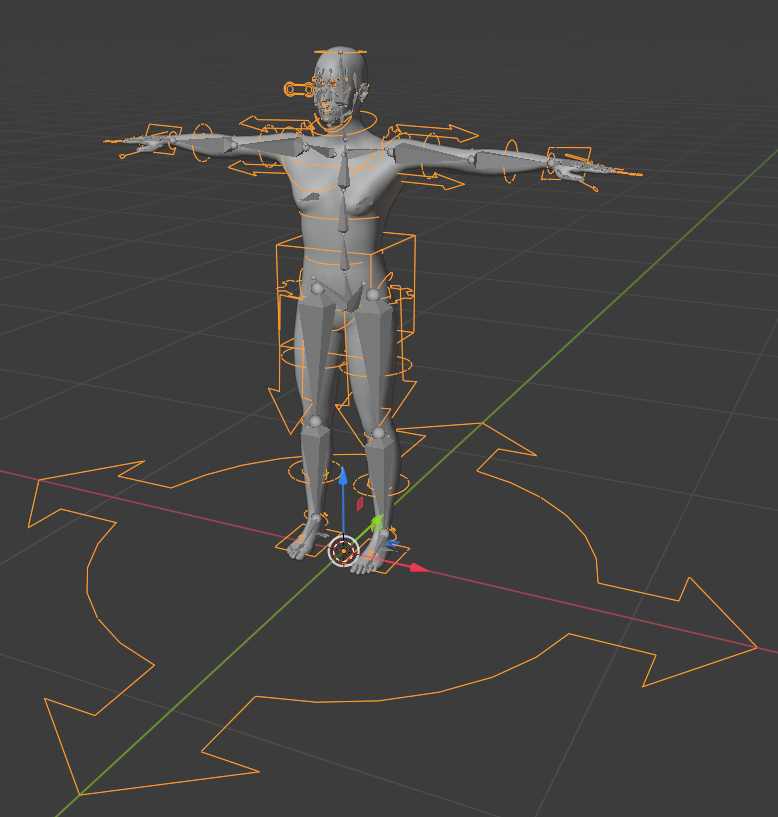
Then hide the metarig bones. The generated rig and controllers can be used for animation.
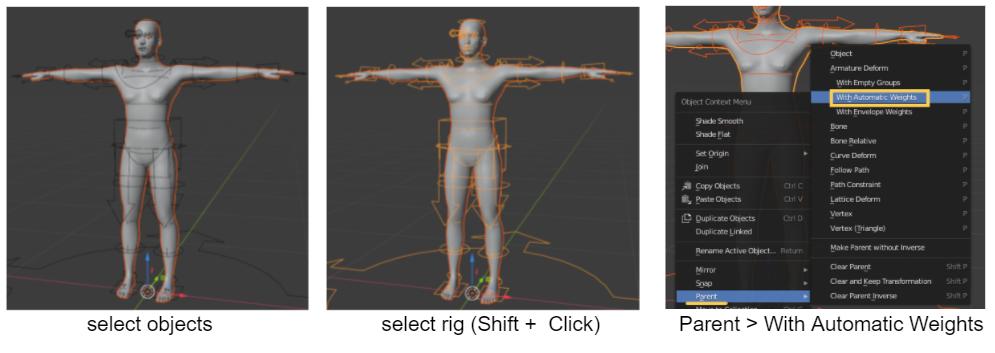
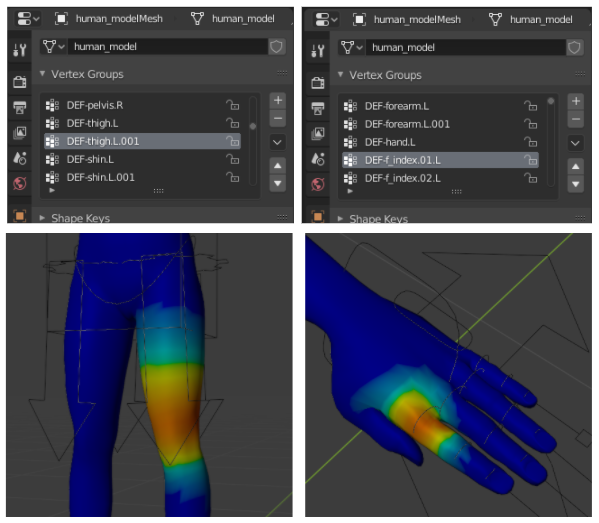
4. Weighting
Select target objects and generated rig. And click with the right mouse key and click “Parent” > “With Automatic Weights”. Select rig and change the mode to “Pose Mode”, to check if the mesh follows rig motion.
Select object and change the mode to “Weight Paint”.
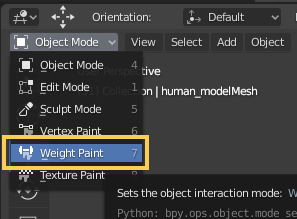
Select parts and paint vertices with draw tool.
5. Change Pose
Change the mode to “Pose Mode”. Translate controllers to change the pose.
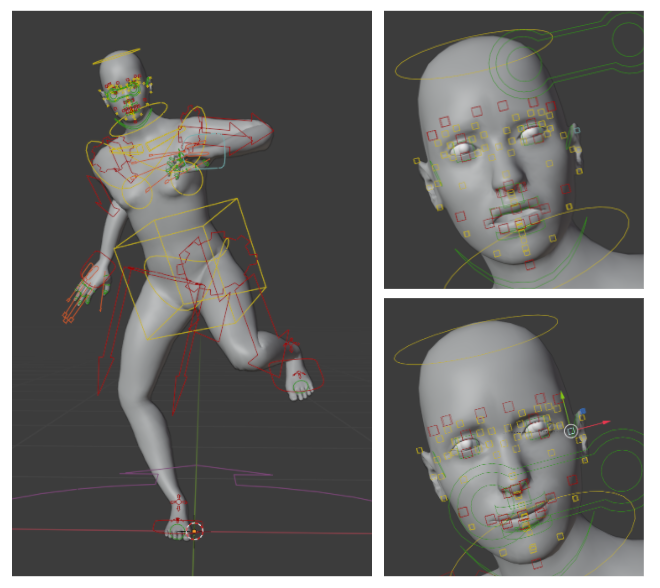
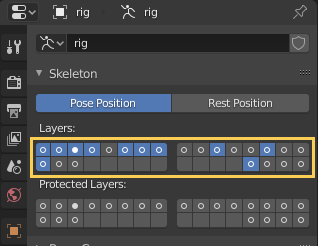
Show/hide control rigs by toggling Layer button.
Postscript
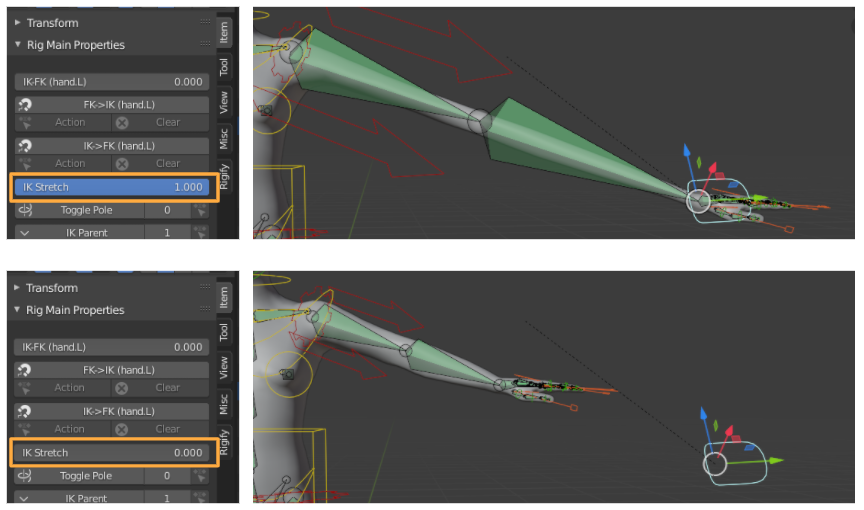
How to constrain the length of bones
Each part such as arm or leg can stretch like a rubber unnaturally. To prevent bones stretching, set “IK Stretch” to 0.0 which is in Item tab on 3D View.