This is a problem I am stuck on, but it is easy to solve.
Problem
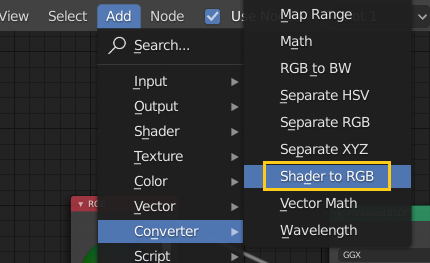
I was finding the shade node “Shader to RGB” that converts the output color of a shade into RGB. However I couldn’t find it in Blender 8.3.
Solution
“Shader to RGB” node is prepared for “EEVEE” renderer only. So we need to change the Render Engine into “EEVEE” and we can find “Shader to RGB” in Add > Converter.
This is a trouble shooting for using bpy.ops.constraint.childof_set_inverse.
Trouble
When I tried to set “Set Inverse” for “Child Of” constraint in bone and executed bpy.ops.constraint.childof_set_inverse(constraint=”Child Of”, owner=’BONE’) on Blender, the following error occurred. How can we solve it?
>>> bpy.ops.constraint.childof_set_inverse(constraint="Child Of", owner='BONE')
Traceback (most recent call last):
  File "<blender_console>", line 1, in <module>
  File "C:\Program Files\Blender Foundation\Blender 2.83\2.83\scripts\modules\bpy\ops.py", line 201, in __call__
    ret = op_call(self.idname_py(), None, kw)
RuntimeError: Operator bpy.ops.constraint.childof_set_inverse.poll() Context missing 'constraint'
Environment
Windows 10 Blender 2.83
Solution
To execute this operation, we should pass the context that contains target constraint and activate the target bone in pose mode.
import bpy

bone_name = "foot.IK.L"
bpy.ops.object.mode_set(mode='POSE', toggle=False)
pose_bone = bpy.context.active_object.pose.bones[bone_name]

# set the target constraint to the context
context_py = bpy.context.copy()
context_py["constraint"] = pose_bone.constraints["Child Of"]

# activate target bone
bpy.context.active_object.data.bones.active = pose_bone.bone
bpy.ops.constraint.childof_set_inverse(context_py, constraint="Child Of", owner='BONE')
This is the log to setup Minecraft server and client to play “Witchcraft and Wizardry” map for multiplayer.
Though there is a detailed documents, I summarized my way to setup the server for beginners. Please note that we will not be liable for any damages caused by use of this add-on and scripts.
The environment
Minecraft Java Edition version 1.16.3 (Select Minecraft Java Edition 1.16 – 1.16.5) CentOS Linux release 7.8.2003 (Core) java version 1.8.0_332
I used rental VPS from ConoHa. You can use other rental servers , too.
Method
Prepare the server
Download server.jar
Generate Minecraft vanilla data with server.jar
Put “Witchcraft and Wizardry” files into Minecraft directory
Change server settings
Run
Prepare the client
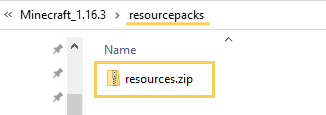
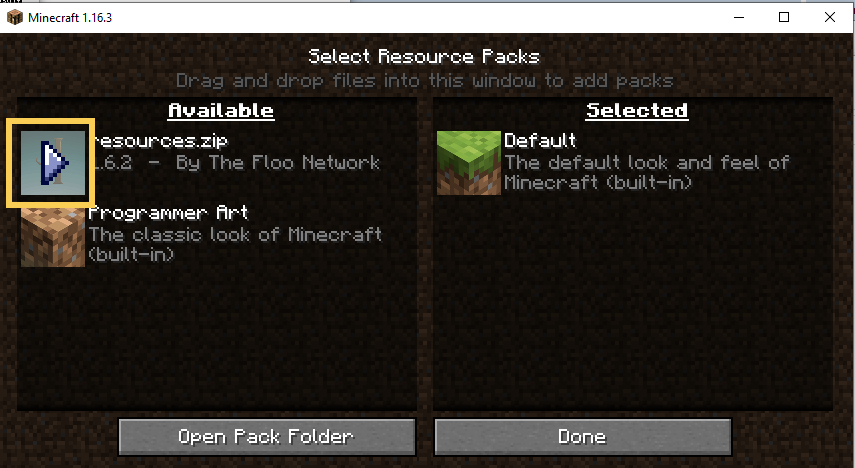
Download resource.zip of “Witchcraft and Wizardry”
Change the resource pack
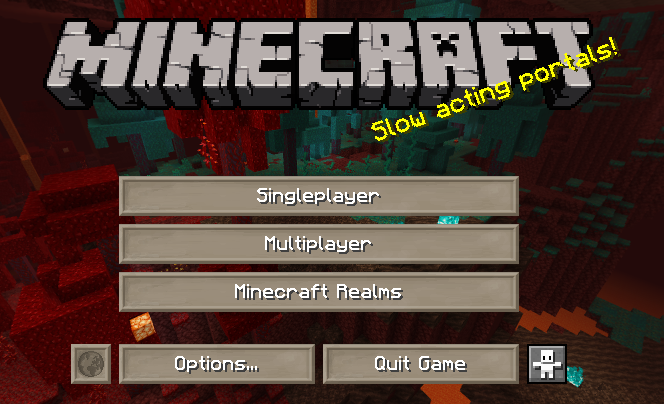
Access the server
1. Prepare the server
1.1 Download server.jar
If you have the vanilla server and the vanilla data, the default world data for Minecraft, on the server, you can skip section 1 and 2. Go to the step 3 Put “Witchcraft and Wizardry” files into minecraft directory!
There are 2 way to download, “download files on the local PC and upload” or “download files on the server directly.”
Download server.jar on the local PC and upload it
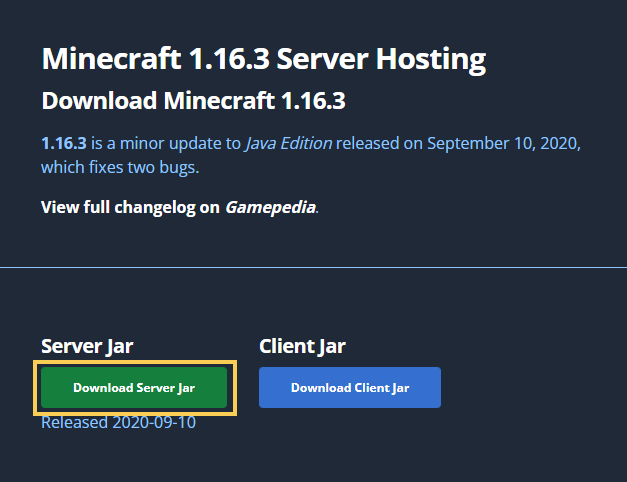
Download the server from mcversions.net. Select the version of your Minecraft and click the button “Download Server jar.” Be careful to select the correct version for your Minecraft!!
Then access the server with WinSCP. Generate “minecraft_server” directory and put the server.jar into the minecraft_server. Rename server.jar into minecraft_server.jar.
Download server.jar on the server directly with command
Access the server with Teraterm and download server.jar directly using “wget” command on the server. Be careful to select the correct version for your Minecraft!!
mkdir ~/opt/
cd opt
mkdir minecraft_server   # create directory where you'd like to setup server
cd minecraft_server

# this is the server for 1.16.3, check the link url on mcversions.net
wget https://launcher.mojang.com/v1/objects/f02f4473dbf152c23d7d484952121db0b36698cb/server.jar

mv server.jar minecraft_server.jar
1.2 Generate Minecraft vanilla data with server.jar
Run minecraft_server.jar
Then run the minecraft_server.jar, and the vanilla world, default world, is generated in “minecraft_server” directory. Remove all items in world directory.
java -Xmx1G -Xms1G -jar minecraft_server.jar nogui

stop # after generating minecraft data
If you are using Forge or fabric, put them on the minecraft_server directory instead of minecraft_server.jar. Be careful to select the correct version for your Minecraft!!
1.3 Put “Witchcraft and Wizardry” files into Minecraft directory
There are 2 way to setup, “download files on the local PC and upload” or “download files on the server directly.”
Download “Witchcraft and Wizardry” on the local PC and upload it
Access the Floo Network page and download the map. I selected “Light version”.
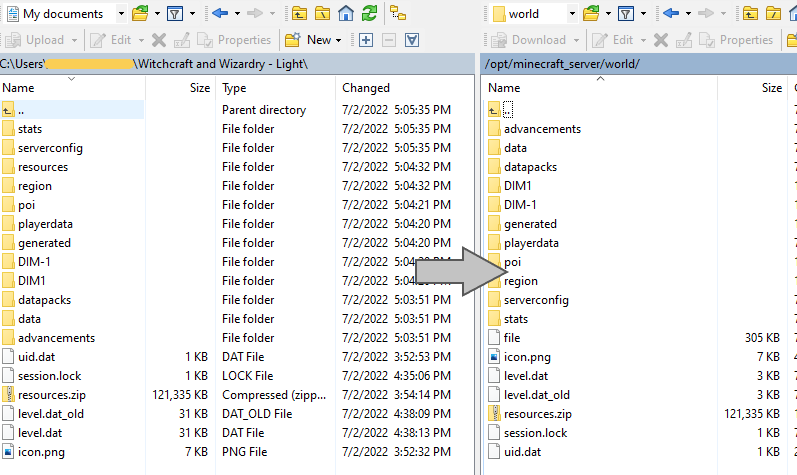
Extract the downloaded zip. Remove files in “world” directory on minecraft_server. Then copy all files in the extracted directory “Witchcraft and Wizardry – Light” into the “world.”
Download “Witchcraft and Wizardry” on the server directly with command
Access the server with Teraterm and download server.jar directly using “wget” command.
mkdir ~/download_wichcraft
cd ~/download_wichcraft

wget http://download2391.mediafire.com/sqwru7rill4g/xke143473zi4ytp/Witchcraft+and+Wizardry+-+Light.zip
unzip Witchcraft+and+Wizardry+-+Light.zip -d Witchcraft_and_Wizardry

rm -r ~/opt/minecraft_server/world/
mkdir ~/opt/minecraft_server/world/ # remove all items from minecraft_server/world/

cp -r Witchcraft_and_Wizardry/* ~/opt/minecraft_server/world/  # copy all items into minecraft_server/world/